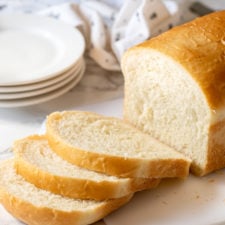
This Easy Homemade Bread recipe is perfect for first time bakers! With just basic pantry ingredients you can bake up a soft and fluffy loaf of sandwich bread in no time!
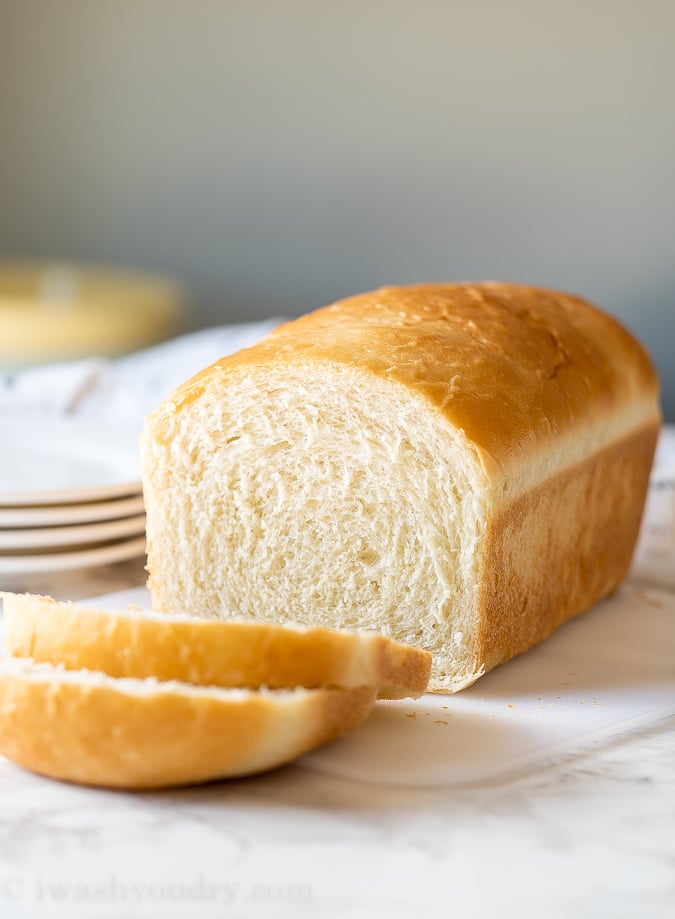 With the world full of uncertainty right now, baking your own loaf of fresh bread can be just what you need to calm your nerves and feed your soul. The best part is that it is seriously so easy to make that you’ll be hooked on homemade bread and never want to buy from the store again.
How To Make Homemade Bread
Let’s talk about the basics of homemade bread and a few key things to keep in mind while making it.
Yeast – Yeast is what gets your bread soft and fluffy and the main ingredient causing it to rise. You really want to make sure you’re working with fresh yeast that’s live and active. There is an easy way to know for sure if your yeast is active and it’s the very first step of the recipe!
Combine warm water with the sugar and then sprinkle your yeast on top. Let it sit for 5 to 10 minutes and it should start to get foamy and frothy. If nothing happens your yeast is not active and you should start over with fresh yeast.
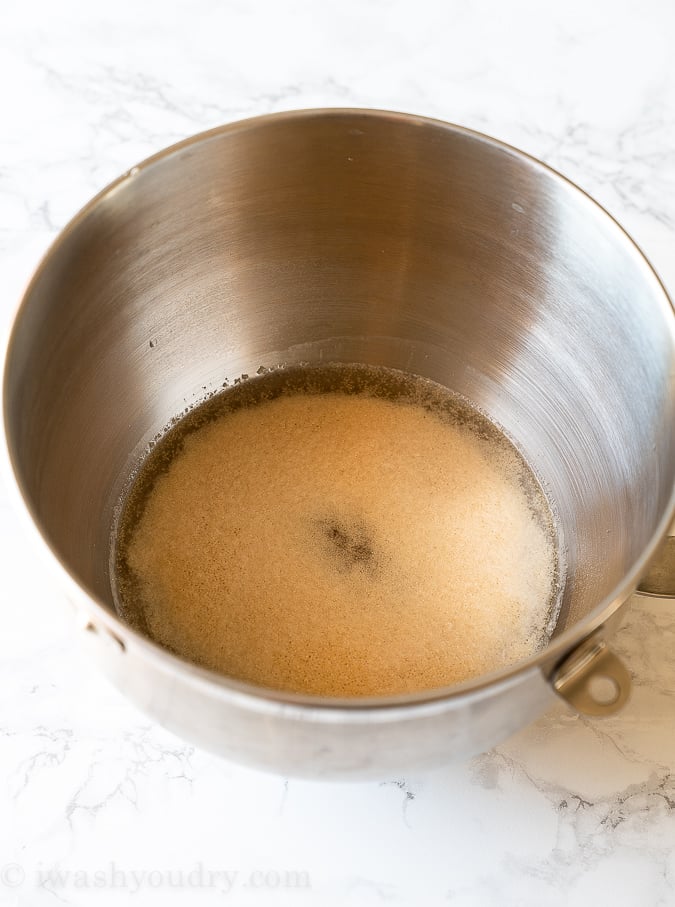
Working With Yeast – continued
Active Dry Yeast vs Instant Yeast – I usually keep a jar of active dry yeast in my fridge, so that’s what prefer to use for making homemade bread. The good news is that this recipe can also work with instant yeast, which will cut your prep time in half.
Active dry yeast requires two rounds of rising in order to get the fluffy texture of bread that you know and love. With instant yeast, you can go ahead and skip the first round of rising and shape your loaves, then let them rise and bake. I personally like the texture of the bread better using active dry yeast, but if all I had on hand was instant, I would not hesitate to use that.
PRO TIP: Keep your yeast stored in a cool and dry place to help it last longer.
Add Remaining Ingredients
Once your yeast has become foamy, it’s time to add in the remaining ingredients and get mixing! Over the years, I’ve found that the best bread consists of the most basic ingredients – sugar, yeast, salt, oil and flour.
Stir in the salt and oil, followed by just 4 cups of all purpose flour. Once the mixture starts to come together, gradually add in another 1/2 cup of flour at a time until the dough comes away from the sides of the bowl and is only slightly tacky when touched with your finger.
PRO TIP: Don’t add too much flour! Knead in the flour a little as you go, testing the bread with your finger between each addition. Too much flour will make a tough and dry loaf.
Kneading The Dough
Don’t Skip The Kneading – If you’re using a stand mixer fitted with a dough hook, once your dough had reached the right consistency you’ll let the mixer do it’s work of kneading the dough for about 5 to 7 minutes. If you are working by hand, simply turn the dough out onto a lightly floured surface and knead the dough for about 10 minutes.
Kneading the dough at this point will help build the gluten in the bread, giving it that perfect bouncy texture. If you fail to knead you could end up with crumbly bread. whomp whomp.
How Long is First Rise?
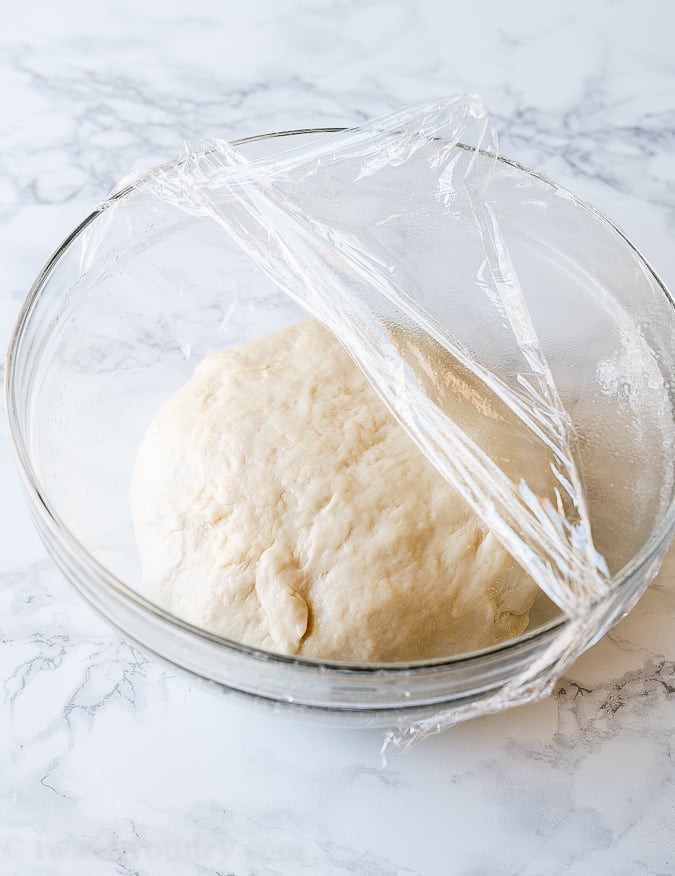
Once your dough has been kneaded, you’ll shape it into a ball and then place it in an oiled bowl, turning the dough once to coat the dough in that oil. Cover with plastic wrap and then place in a warm location to let the dough rise, or double in size.
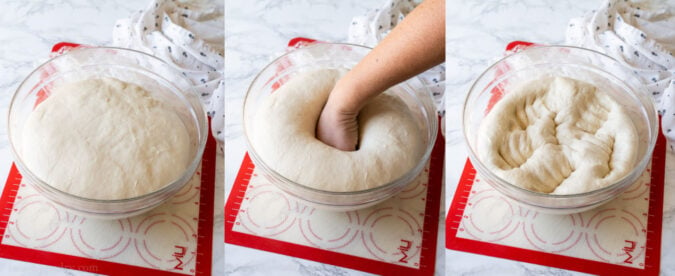
The length of time it takes your dough to double in size depends on the temperature of the room. Typically, you’re looking at about 1 hour of rise time. However, the cooler the room, the longer it will take.
PRO TIP: I’ll turn my oven on to preheat for just 1 to 2 minutes, then shut it off. When it’s nice and warm in my oven I’ll set my dough bowl in there and it rises beautifully.
How To Shape Sandwich Bread
Here’s the fun part! Shaping the sandwich bread is super easy to do. Punch down your dough after it’s first rise, then divide the dough into two equal parts. Roll the dough out into rectangles and then roll up the dough on the short edge and place in a greased loaf pan for it’s second rise.
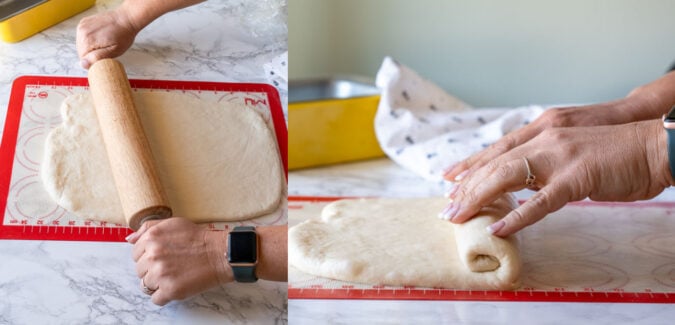
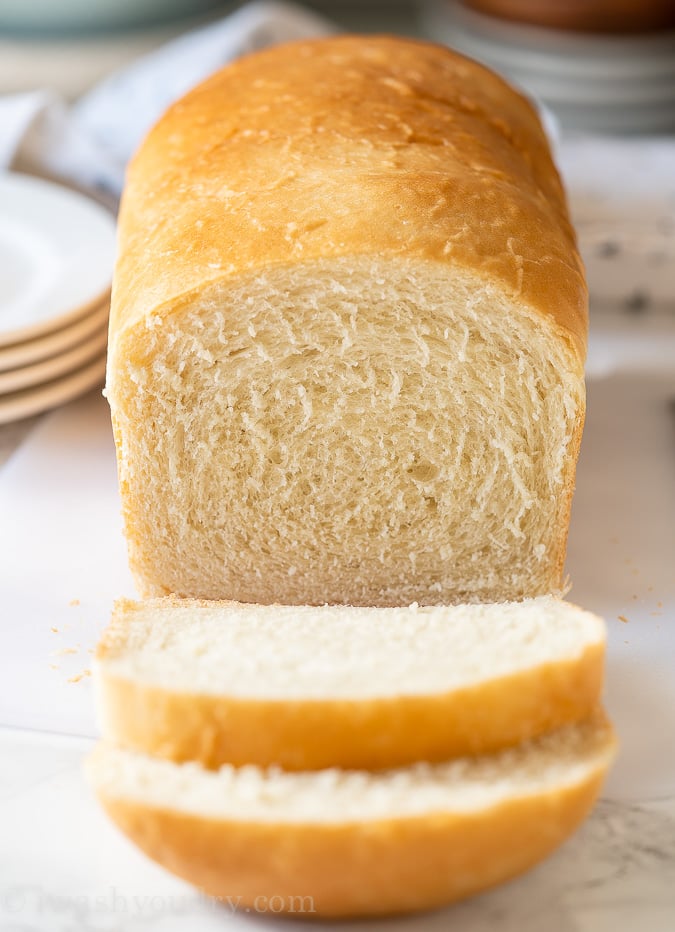
I love rolling my bread like this because it seems to give it a beautiful texture on the inside as well as a nice rounded top when baked.
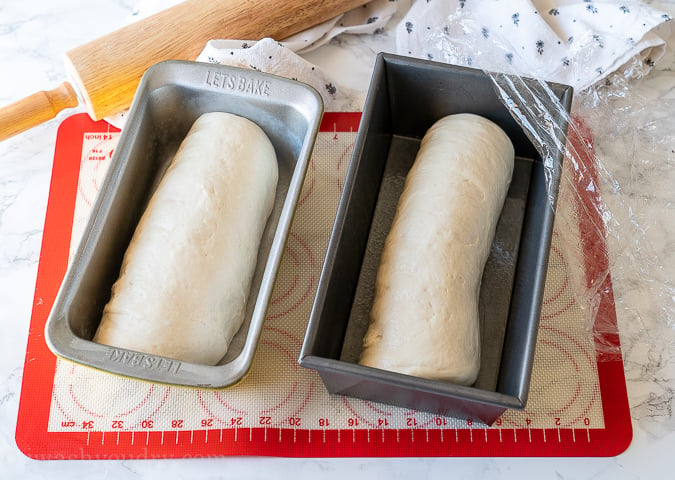
Best Loaf Pan For Sandwich Bread?
I’ve found that anything close to a 9″x 5″ pan works wonderfully. I have some smaller and some larger and they all work great! The smaller loaf pan will tend to give you more of that mushroomed top that you’re used to seeing with typical sandwich bread, while a larger loaf pan will look more rounded on the edges.
I prefer to use either an aluminum or ceramic loaf pan. I haven’t found any significant difference between a dark or light coated pan in the final results.
How Long For Second Rise?
The second rise can take anywhere from a 30 minutes to 2 hours, again depending on the ambient temperature in the room. I’ve found the bread rises fastest when I keep it in that warm oven.
You’ll know your bread is ready for baking when it’s risen about 1/2″ to 1″ above the side of the pan.
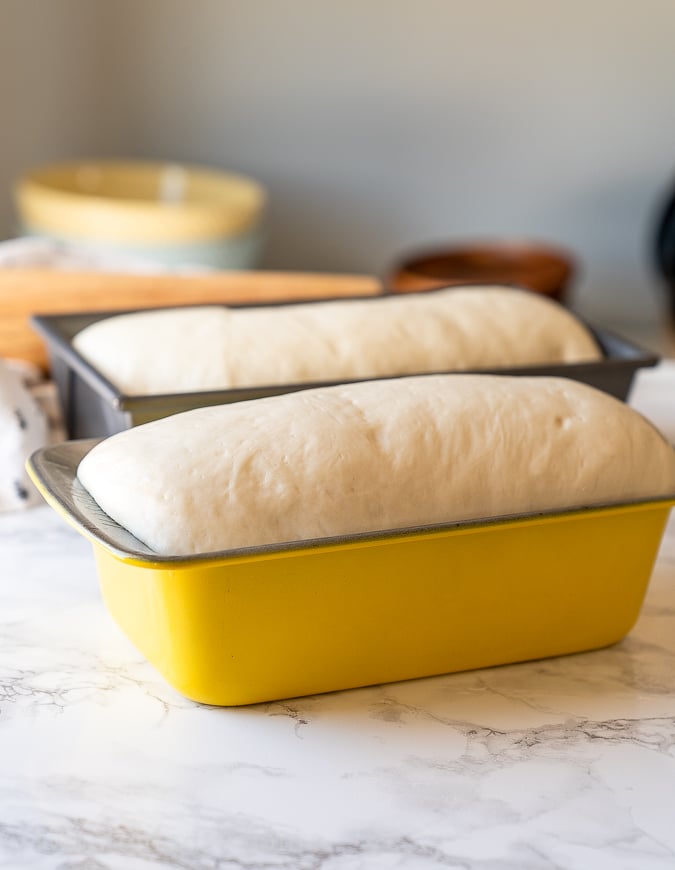
A smaller pan will have a higher rise because it doesn’t have anywhere else to go but up. A larger loaf pan will have a minimal rise, but should still reach above the sides of the pan.
How Long To Bake Bread
It doesn’t take long to bake once you’ve finally reached the point of baking! All you need is about 30 minutes and your house will smell gloriously like fresh baked bread.
There should be a candle scent for fresh baked bread, am I right?!
PRO TIP: You’ll know your bread is done when it’s golden brown on top and sounds hallow when tapped. Also, for those who want to be sure – bread is finished cooking when it reaches between 195° and 200° F internally. I love this quick read thermometer for easily checking temperatures.
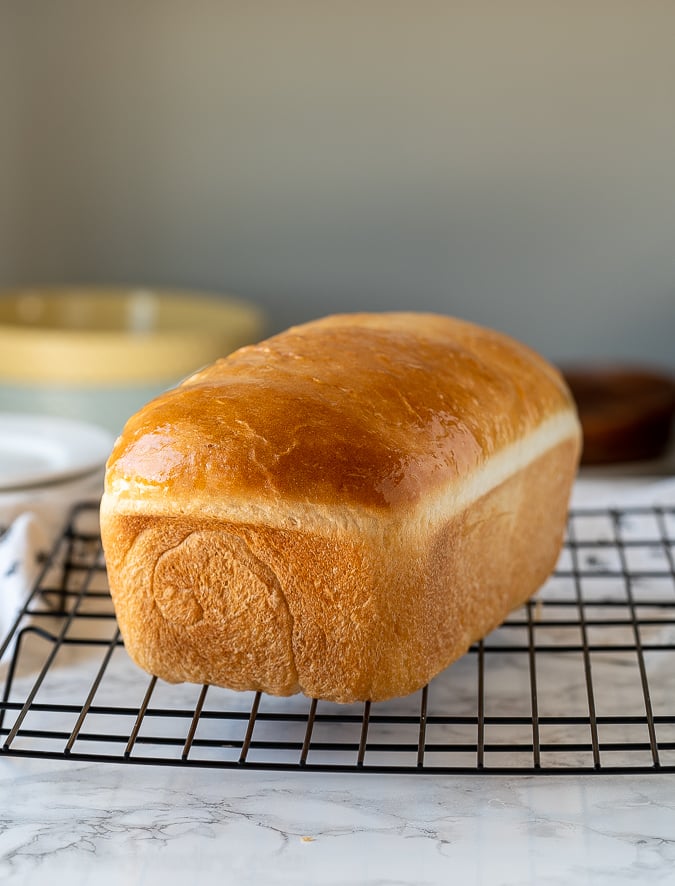
How To Store Bread –
Once your bread is baked, let it cool in the pan for just 5 to 7 minutes before placing on a wire rack to cool. If you let it sit for too long in the pan it will want to steam and can turn your loaf soggy on the sides.
I also love to spread a little butter on the tops of the bread right as they come out of the oven to give that top crust a nice sheen. It also helps to soften the top crust and gives it great flavor.
Store bread once cooled in an airtight bag or container on the counter for up to 7 days. You can refrigerate or freeze your bread for a longer life, but we personally don’t have bread stick around for longer than a few days before everyone gobbles it up.
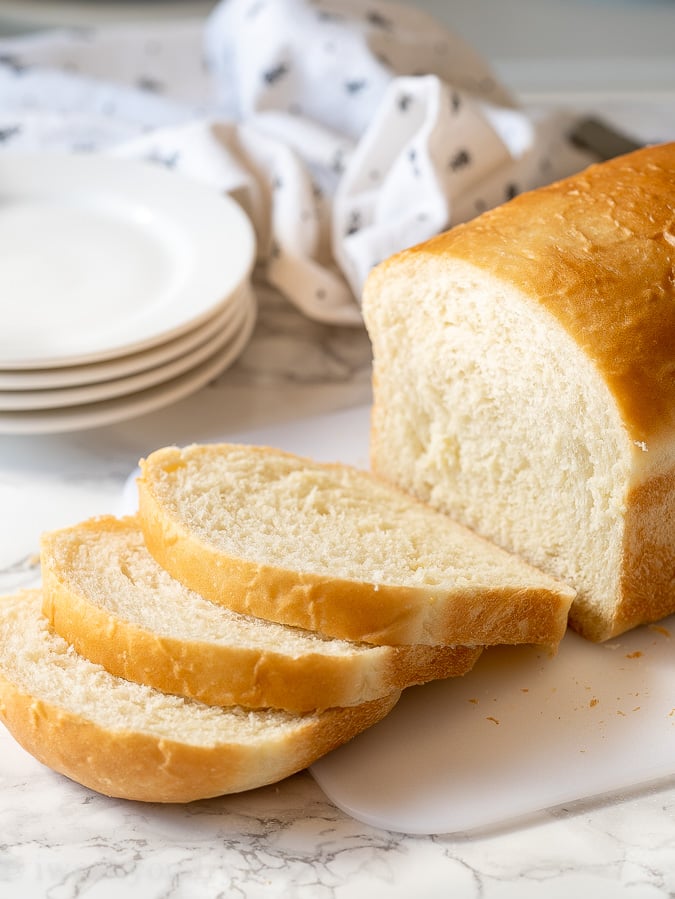
Ways To Use Homemade Bread:
There is seriously nothing better than a slice of fresh homemade bread that’s still a little warm with a slather of butter on top. Mmm! Here are a few of our favorite ways to use it…
- Used to make sandwiches (cold or hot)
- French Toast
- Paninis
- Garlic Bread
- Classic Stuffing
More Homemade Bread Recipes To Try
- Dinner Rolls
- Cinnamon Rolls
- Soft Flour Tortillas
- Jalapeno Cheddar Bagels
- Small Batch Garlic Breadsticks
If you have any questions or need help, please feel free to ask in the comments section below. I hope you give this recipe a try and see just how easy it is to make your own homemade bread!
Easy Homemade Sandwich Bread
Ingredients
- 2 cups warm water, between 105° F - 110° F
- 1/2 cup sugar
- 2 1/4 tsp active dry yeast
- 2 tsp salt
- 1/4 cup canola oil
- 5 to 6 cups all purpose flour
Instructions
- Add warm water and sugar to the bowl of your mixer and stir to dissolve the sugar. Add in the yeast and let it activate for 5 to 10 minutes, until the mixture becomes foamy and/or frothy.
- To the yeast mixture, add in the salt, oil and 4 cups of flour. Use your dough hook attachment to stir the mixture together, scraping down the sides of the bowl as needed.
- Gradually add 1/2 cup of flour at a time, while kneading the dough with the dough hook, until the dough pulls away from the edges of the bowl and is only slightly tacky when touched. Knead for an additional 5 to 7 minutes to activate the gluten in the bread. Shape the dough into a round ball.
- Coat a large bowl with oil or non-stick spray and place dough ball in, turning once to coat dough with oil. Cover loosely with plastic wrap (be sure to spray the bottom side of the plastic wrap with non-stick spray so dough does not stick). Let dough rise for 1 hour, or until double in size.
- Punch down dough and turn out onto a lightly floured surface or silicone baking mat. Divide the dough into two equal parts and roll into a rectangle, with the short edges measuring about 8 inches long. Roll up the dough starting at the short edge and place each rolled dough in a lightly greased loaf pan. Cover loosely with greased plastic wrap and let rise again for 1 to 2 hours, or until dough reaches 1/2" to 1" above pan. Remove plastic wrap.
- Bake the bread in a 375° F preheated oven for 30 to 35 minutes, till bread tops are golden brown and sound hallow when tapped. Let bread cool in pan for just 5 to 10 minutes before removing from pan to wire rack to cool completely.
- Let the bread cool before slicing and enjoying!
Notes
- How To Store - Keep bread wrapped in plastic or in an air tight container on counter for up to 7 days. Bread can be refrigerated or frozen to lengthen life of bread.
- Whole Wheat Flour - Substitute up to half of the all purpose flour with whole wheat flour if desired.
- Instant Yeast - If using instant yeast, you can skip the first rise and go right to the second rise.
- Size of Loaf Pan - Any size close to 9"x5" (within a couple inches) will work great!










 Honey Sesame Chicken Stir Fry
Ellie
I’m a bit confused since the recipe calls for 5-6 cups of but the directions say 4 cups .
I had to add a bit more flour since the dough was super sticky.
Carrie
I’m new to making my own bread. I’ve probably baked 10 loaves now, with a few different recipes, which have all turned out, just….fine. But your recipe, hands down has been the best! I opted to do mine by hand, without my mixer, I choose to believe that kneading by hand, lends extra love to the bread, ha ha. I totally appreciate that this recipe makes TWO loaves, as this bread does NOT last long in our house. The rise time seemed to take a little longer than the other breads I have made, but no bother when the bread comes out tasting this good! Thanks so much for sharing such a lovely recipe! I have a feeling I will know this recipe by heart before too long!
Brooke
Made this bread recipe twice. The first time i made it the first loaf lasted one day between my boyfriend and i. Decided to make this recipe for the second time tonight. Doubled the batch but split the dough into three loaves. I used instant yeast the first time and was pleased with the results. This go around i used active dry yeast and i am astonished at the results. This recipe is perfect and so easy to make.
Dianna
What temperature do you preheat the oven to to help the bread rise???
Libby
I just turn the oven light on and put the bread in. Works great!
Kathy
Can you substitute vegetable oil for canola oil?
Kasey
I wonder if butter could be used instead of canola oil, as an experiment?
Shawn
You could definitely try that out. Let us know what you think!
Jess
Thank you so much for this recipe! I have been wanting to experiment with bread for quite some time, but always felt intimidated and lost my confidence reading through complicated recipes. My area is experiencing food shortages at the moment as there is a supply distribution due to extensive flooding south of us. Store bought bread is cleared out, so I took to Pinterest this morning and stumbled on your recipe! Thank you for an easy to follow, delicious outcome! I’m pleased to be able to provide my family with fresh bread, and feel very proud of myself today, so thank you so much!
Anne
The best loaves of bread I’ve ever made.
Sarah
Can you freeze dough after first rise?
Tiffany
This bread is AMAZING!!! It’s easy to make and tastes sooo good! I’ve shared with my family and everyone is raving! I did spread some butter on top of the loaf when it came out and omg it made it look beautiful and is not greasy after soaking in! My question is could you make a cinnamon sugar loaf with this recipe? If so, what would be your suggestion? Was thinking when rolling the rectangle after rolling it out sprinkle the cinnamon sugar so it will be inside? Any suggestions would be wonderful! Thank you!!!!!
Shawn
I’m so glad you enjoyed it! I think if you sprinkled in cinnamon and sugar when rolling that would work, just make sure it’s baked all the way through before taking out.
Robin
Hi there I love this bread, im new to bread baking and this is the only one that works work us and stays fresh after frozen too.
Question, if I double the batch do I double the yeast, or triple batch triple yeast. I made 2 different bowls the other day because I wasnt sure. But I like to make 6 loaves at once to last a week. Thank you
Shawn
Doubling the recipe should be just fine, so long as you have a bowl large enough to handle all the dough!
Connie Smith
Picture perfect and tastes good too!
Shawn
So glad you enjoyed it!
Gladys
Can you make in a bread maker machine???
Nancy
I’m still having trouble with this bread. I’m proofing the yeast as directed and it’s fine. I have tried both the instant and the active dry. I think the texture of the dough seems good; not too tacky nor too dry. The first rise is great. I roll it out as you did but the second rise is never that good. And if it does rise, it falls when I put it in the oven. Any more suggestions? I’m a great cake baker, but this bread is testing my patience!
Shawn
If you’re using instant yeast, you’ll want to skip that first rise and just go to the second rise. I’m wondering if that’s why it’s falling the second time?
Lori
My family loves this recipe, so delicious. I was wondering can you use bread flour instead of all purpose?
Shawn
Yes definitely!
Nancy
I’m not having great results. It seems that 6 cups of flour is still to wet and almost impossible to handle, however I think my loaves are far from soft and fluffy like yours. What do you think?
Shawn
Hi Nancy, I’m sorry you’re running into some issues. I would make sure your yeast is active first. Then, make sure you add the flour gradually while you’re mixing the dough. Some locations will need more flour than others, so if you happen to need a little more than 6 cups, that’s ok. The dough should be slightly tacky when it’s ready. It shouldn’t be sticky, but not totally smooth either. I hope that helps!
Kristen
What if you don’t have a dough hook for your mixer? Can you do this all by hand?
Shawn
Hi Kristen, you can make it by hand! Just stir the dough together until you’re able to knead on a lightly floured surface.
Jessica
This recipe is AMAZING!! I’ve tried others that are really good, but I have to say this one is perfect. 🙂 I don’t see these loaves lasting long! Was going to post pics but not seeing a place to do that.
Shawn
That’s great to hear Jessica! I don’t have a way to upload user images, but you can always share it on Instagram and tag me! I’ll be able to share it with my followers that way! 🙂
Terry
Can I use this recipe in a bread machine?
Shawn
I don’t see why not? I would just follow the instructions from your machine, but you’ll probably have to cut the recipe in half, since this recipe makes two loaves.
Katherine Segura
Love all these recipes
Shawn
Thanks Katherine! That makes me happy to hear!
Thresa Johnson
I have made this recipe twice and am making it again today because this bread turned out amazing! Me and my family absolutely loves it! It’s so easy to make, it tastes great and the loaves are so picture perfect! Thank you so much for sharing this recipe!!
Wanda Duckworth.
Can self rising flour be used if thats all you have ?
Shawn
Unfortunately no, there is baking powder in self rising flour and it should not be combined with yeast breads. However, I do have a 2 ingredient dough breadstick that uses self rising flour! 2 Ingredient Dough Garlic Breadsticks
Catherine Lee
Actually you can. If you use instant yeast and skip the first rise. It will turn out as English muffin type bread with lots of nooks and crannies for butter when sliced and toasted. So good. Unless you want regular sandwich type bread, then regular flour.
Marilyn
Is the measurement the same for instant yeast?
Shawn
Yes!
Rabitha Ashraf
How much is the measurement of instant dry yeast
Shawn
You’ll want to use the same amount – 2 1/4 tsp
Ashlee
This sounds and looks sooo good! It’s just my husband and I, and we don’t eat a whole lot of bread..can I halve this? Also just wanted to say, thank you for all the recipes! So glad I came across your site. 🙂
Shawn
Hi Ashlee, you can definitely halve the recipe for a single loaf!