

Homemade Buttermilk Syrup is a thick and creamy topping that’s perfect for drizzling over waffles, pancakes or ice cream!
This delicious syrup also makes a tasty homemade gift.


Why You’ll Love Buttermilk Syrup
Homemade Buttermilk Syrup is a recipe that’s been around for ages. I was first introduced to this deliciousness through my sister in law, Rebecca.
She would always make homemade treats for everyone for Christmas, and one year she gifted us a jar of this liquid gold. It’s life changing guys.

The trick with this super easy homemade buttermilk syrup is to not over cook it.
You can go from sweet and delicious to bitter and gross if you burn the sugar. Just make sure you keep stirring and keep an eye on the mixture while it boils.
Ingredients for Buttermilk Syrup
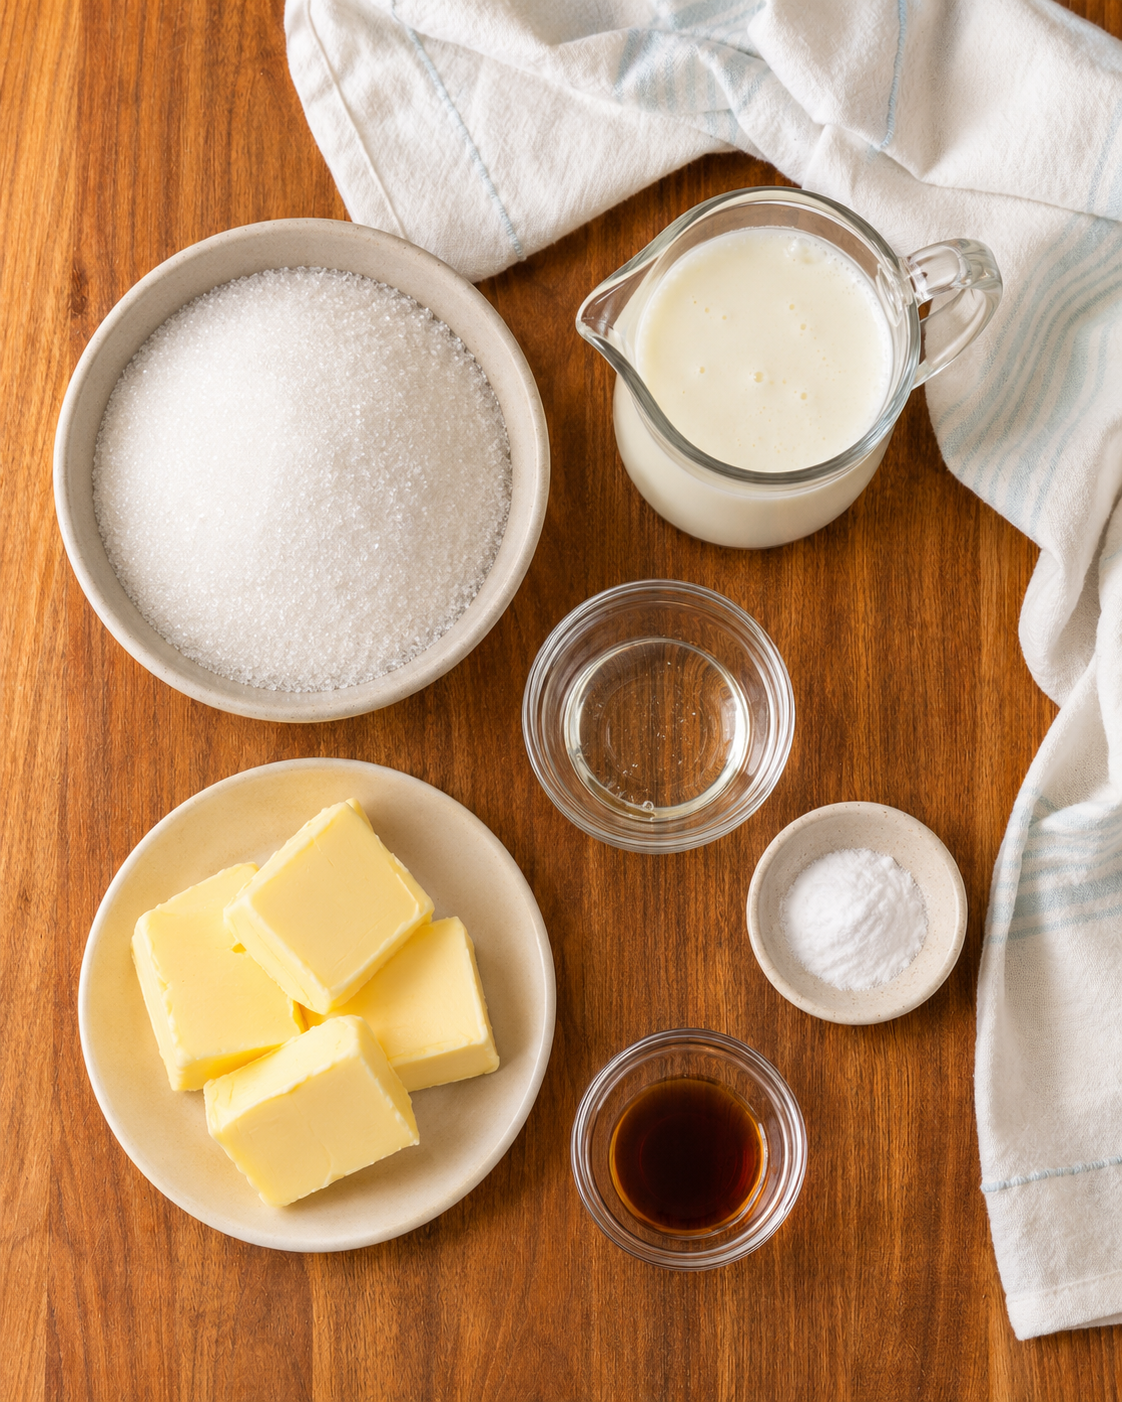
Here’s the basic list of ingredients you’ll need in order to make homemade buttermilk syrup. As always, you can find the full list of ingredients located in the printable recipe card below.
- Butter – go with unsalted butter for this recipe
- Sugar – a basic white granulated sugar is all you need
- Buttermilk – for that perfect tang and creamy flavor
- Karo Syrup – used to balance the flavors and texture in the syrup. You can also use pure maple syrup or agave syrup if desired.
- Baking Soda – this counteracts with the buttermilk to balance out the acidity in the syrup, giving it a silky texture and preventing the syrup from curdling.
- Vanilla Exact – to aid in the delicious flavor of the golden syrup.
How To Make Buttermilk Syrup
This easy homemade buttermilk syrup comes together in about 15 minutes with just six simple ingredients. Here’s how to make it!
Combine the Ingredients
Add the butter, sugar, buttermilk and light corn syrup to a pot with tall sides. Make sure there’s plenty of extra room because the syrup will foam up to double its size when you add the baking soda.
Bring to a Boil
Bring the mixture to a boil, stirring frequently. Once it starts boiling, cook for 2 to 3 minutes, continuing to stir. Keep a close eye on the syrup during this step so the sugar doesn’t burn.
Add the Baking Soda and Vanilla
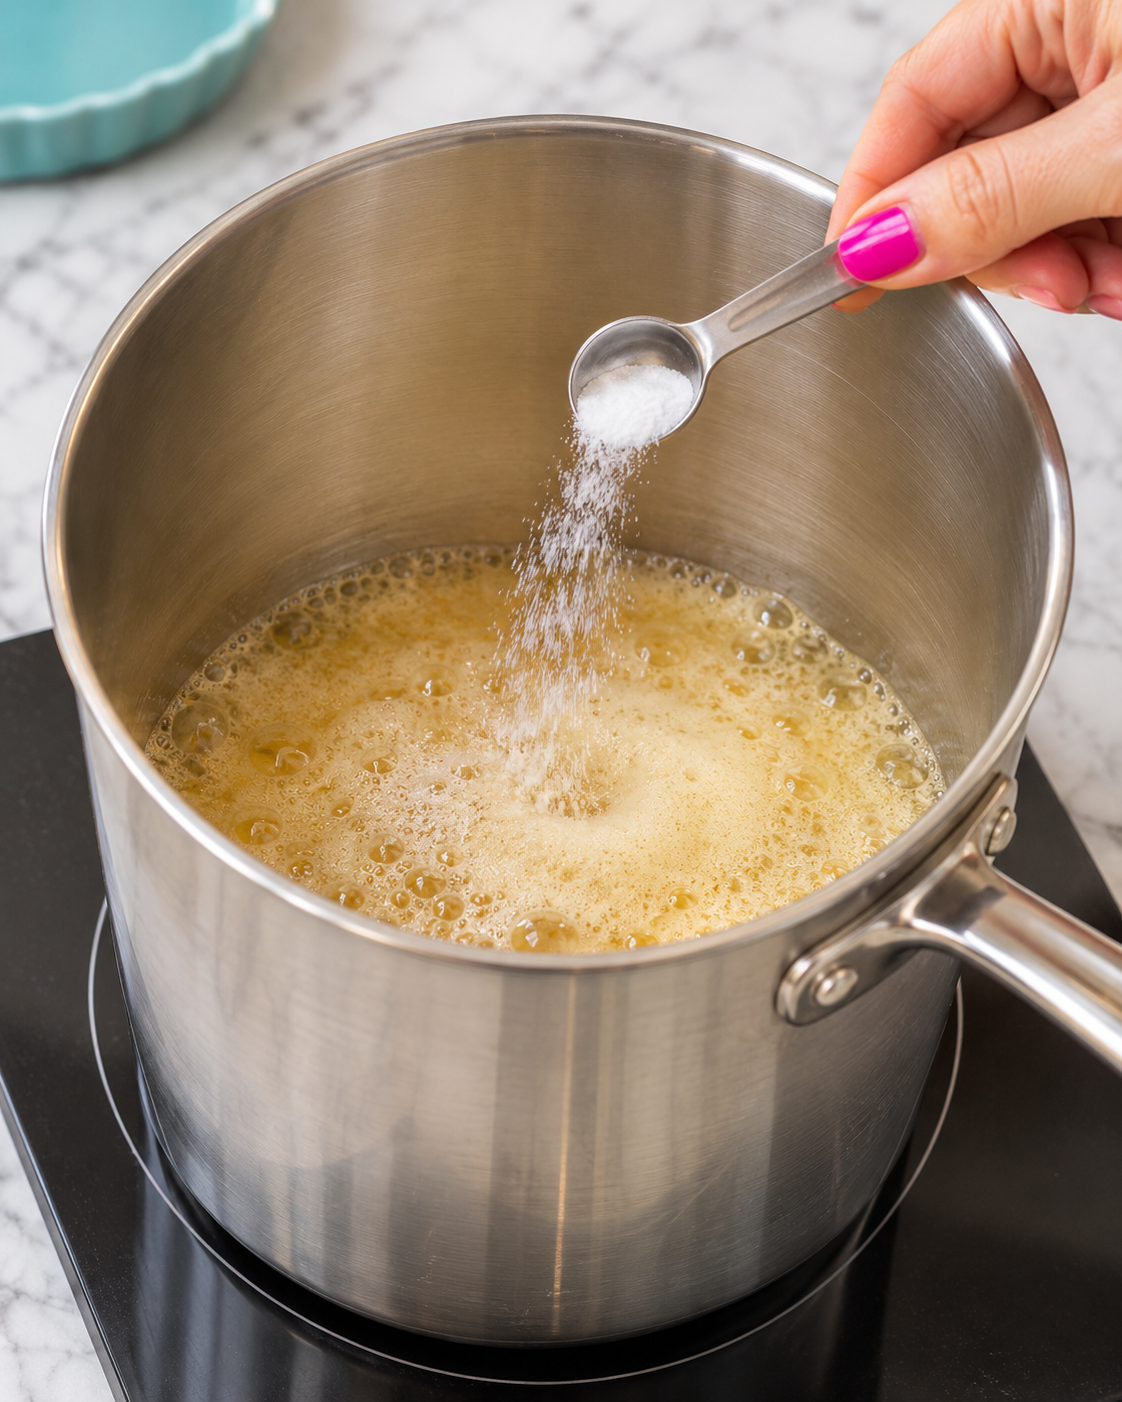
Stir in the baking soda and vanilla until combined. The mixture will foam up and turn a light golden brown, so be ready for it to expand!
Stir and Serve
Remove the pot from the heat and continue stirring until the syrup thickens.
Ways to Use Buttermilk Syrup
We love to serve the buttermilk syrup over hot pancakes, like these Strawberry Greek Yogurt Pancakes. One of our favorite ways to use the syrup though is on top of vanilla ice cream.
The syrup thickens over the cold ice cream and it’s almost like a chewy caramel. Try adding a few chopped pecans on top for an extra special sundae!

Make Ahead and Storage
This homemade buttermilk syrup is easy to prepare ahead of time, making breakfast a little simpler! Whip up a batch before you need it, then warm up a portion when you’re ready to serve.
Make Ahead
Prepare the syrup as directed a day or two before serving. Transfer it to small, heat-safe containers and refrigerate promptly, within 2 hours of cooking. Once chilled, cover tightly and keep refrigerated until ready to use.
Refrigerator Storage
Store buttermilk syrup in an airtight container in the refrigerator at 40°F or below. For a cautious storage guideline, use it within 3 to 4 days of making it, including any time it spends in the fridge before serving.
The syrup will thicken as it chills, so warm it before drizzling over pancakes or waffles.
Freezer Storage
For longer storage, freeze a freshly made batch once it has chilled. Divide the syrup into small, airtight, freezer-safe containers, leaving a little room at the top for expansion.
Freeze for up to 3 months for best quality. Thaw in the refrigerator, then keep refrigerated and use within 3 to 4 days.
How To Reheat Buttermilk Syrup
Warm the portion you plan to use in a microwave-safe container in short intervals, stirring between each one. You can also warm it gently in a small saucepan over low heat, stirring frequently.
PRO TIP: Freeze the syrup in small portions so you can thaw just enough for your next pancake breakfast!

You’re going to love this creamy and sweet syrup!
HELPFUL PRODUCTS TO MAKE THIS RECIPE:


Make sure you don’t miss a thing! Follow I Wash You Dry here:
FACEBOOK | PINTEREST | TWITTER | INSTAGRAM | BLOGLOVIN

Homemade Buttermilk Syrup
Ingredients
- 1/2 cup butter
- 1 cup sugar
- 1/2 cup buttermilk
- 1 tablespoon Light Karo Syrup
- 1 teaspoon baking soda
- 1 teaspoon vanilla extract
Instructions
- Combine the butter, sugar, buttermilk, and Karo syrup in a pot and bring to a boil for 2-3 minutes, stirring frequently.
- Add the baking soda and vanilla and stir till combined. The color of the syrup will turn to a light golden brown. Remove from the heat and continue to stir till the syrup thickens. Let it cool and serve immediately, or store in fridge in an air tight container. (you can warm it up in the microwave)
Notes
Nutrition
Originally published on 5/10/2012. Updated with new photos on 7/18/2017.
PIN THIS IMAGE TO SAVE THE RECIPE:


How long can you keep stain yhr fridge?
For a cautious storage guideline, I recommend keeping it in an airtight container in the refrigerator and using it within 3 to 4 days. Be sure to refrigerate it within 2 hours of making it. Warm up the portion you need before serving, or freeze any extra for longer storage (up to 3 months).
Can this recipe be made with maple syrup rather than high fructose corn syrup?
According to Gemini:
Can you omit or replace the corn syrup (Karo)?
Yes, easily. In this recipe, the single tablespoon of corn syrup acts as an interfering agent—its invert sugars get in the way of the sucrose molecules so they can’t link back together and turn your smooth syrup grainy as it cools.
Best 1-to-1 Swaps: Use 1 tablespoon of honey, pure maple syrup, or agave nectar. They all contain invert sugars and will prevent crystallization just as well while adding a subtle background flavor.
Omitting it completely: You can leave it out entirely, especially if you plan to eat the syrup warm right away. Because buttermilk contains lactic acid (which also helps break down sucrose into invert sugars), it has some natural anti-crystallization protection built in. If you store leftovers in the fridge without it, it may get slightly sugary around the edges, though gentle reheating on the stovetop over low heat will smooth it right back out.
I’m also curious about the baking soda what is the purpose and could you leave it out?
According to Gemini
Why the baking soda?
The baking soda serves three critical chemical purposes here, and you shouldn’t skip it:
Texture and Foam: Buttermilk is acidic. When alkaline baking soda hits the warm, acidic buttermilk, it triggers a rapid chemical reaction that releases carbon dioxide gas. That’s what makes the syrup foam up dramatically and gives the finished sauce its signature light, creamy, aerated texture instead of a heavy, flat glaze.
Color and Caramel Flavor: Baking soda raises the pH of the mixture, which dramatically accelerates the Maillard reaction and caramelization. That is why the syrup instantly turns from pale white to a rich golden brown and develops a deep butterscotch/caramel flavor without needing to be cooked to high candy temperatures.
Prevents Curdling: Boiling acidic buttermilk with butter can sometimes cause the milk proteins to separate or taste overly tangy. The baking soda neutralizes enough of the acid to keep the emulsion smooth and balanced.
(Note: That 1 teaspoon of baking soda is also why the recipe warns you to use a tall pot—it genuinely will double or triple in volume for about 30 seconds!)
Has anyone responded to your question? How long does it last? I would like to make ahead for Christmas gifts.
I’m curious about the baking soda in this recipe, what is the purpose and can it be left out?