Drum roll please…
The time has finally come!! I’m about to POP, I am so excited to share my Kitchen Reveal with you guys today!!
We moved into our house back in January, and I immediately started planning on how I was going to transform the kitchen. No, that’s a lie. I was already planning what I was going to do the first time I walked through the house (before we even signed the papers). I drew diagrams (several times), created Pinterest boards with images of kitchen inspiration, organization ideas, and color schemes, and spent hours pouring over home decorating magazines.
Ultimately I wanted a kitchen that was filled with bright natural light, clean lines, timeless and also have a modern/contemporary look. When it was all said and done, it looks exactly like I imagined it would and I could not be more happy with the results.
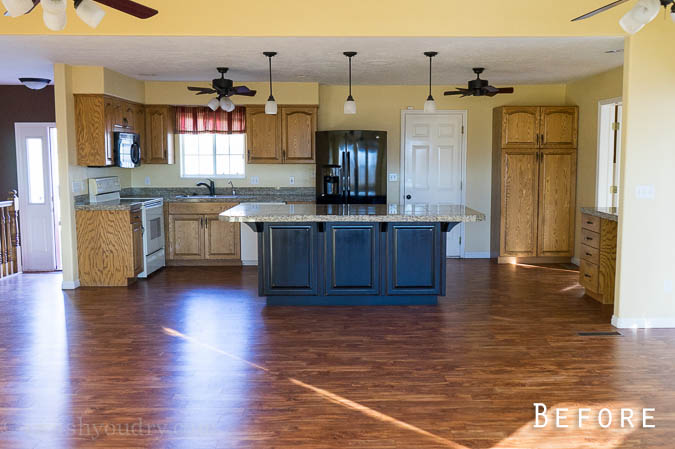
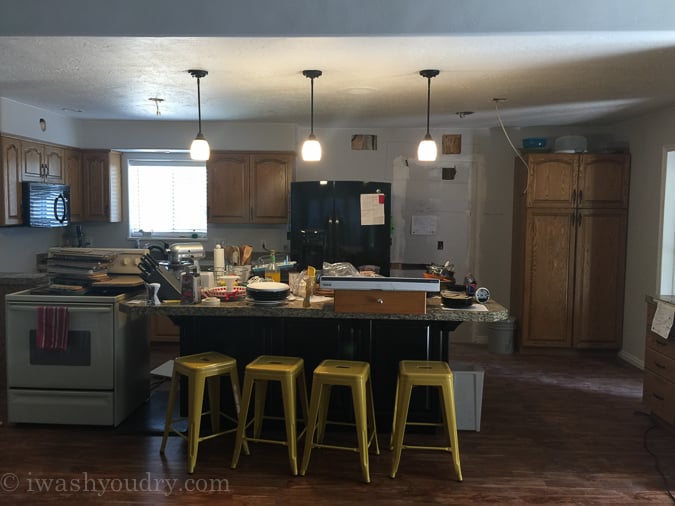
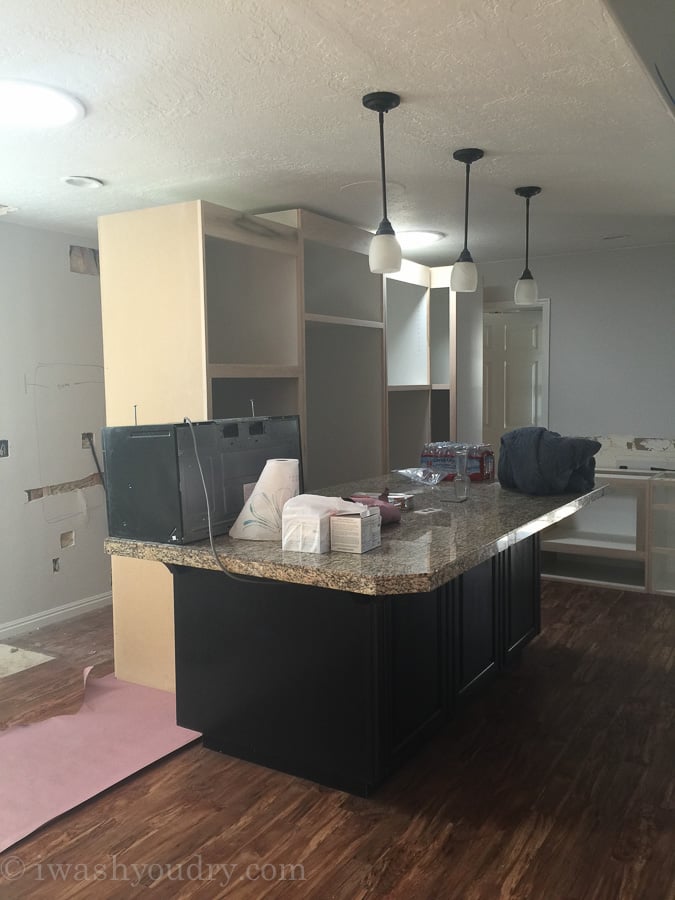
These pictures were taken the day we got the keys to the house. Oh memories…
The previous owners had done a lot of work to open up the original kitchen layout, but that door in the middle of the kitchen went into the garage, which was kind of awkward. It had to be moved…
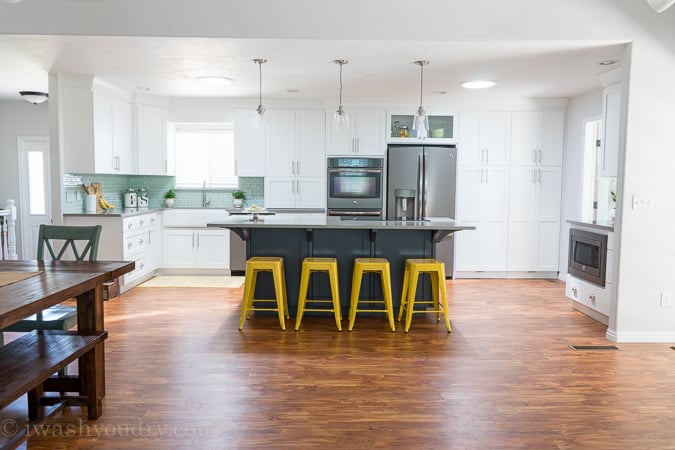
Ta-da!!
How stinking gorgeous is this bright and beautiful kitchen!?!
It doesn’t even look like the same place anymore! But yes, yes it is.
We moved that pesky garage door into the laundry room which is located on the right…
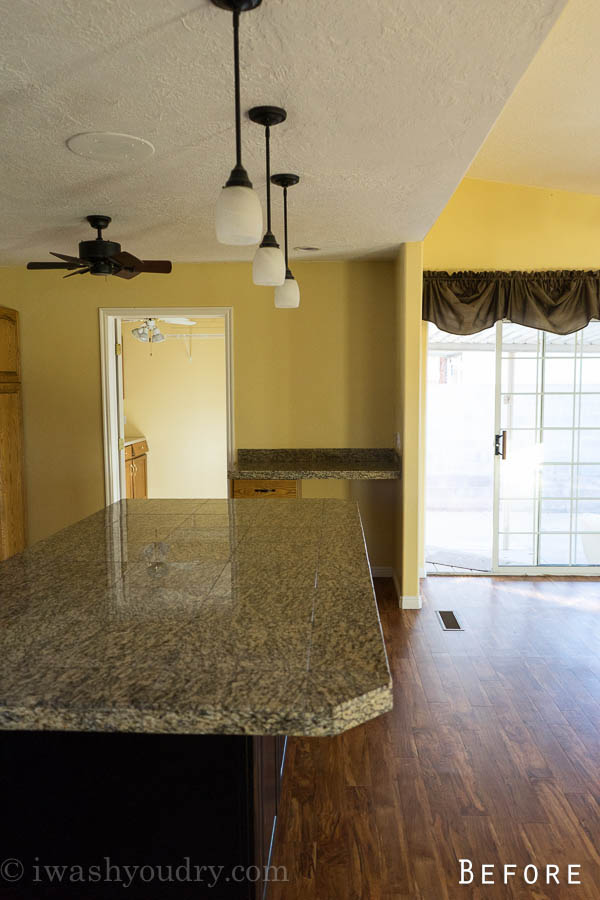
Here you can see the laundry room on the left through that doorway. Those cabinets were removed to make way for the new entrance to the garage.
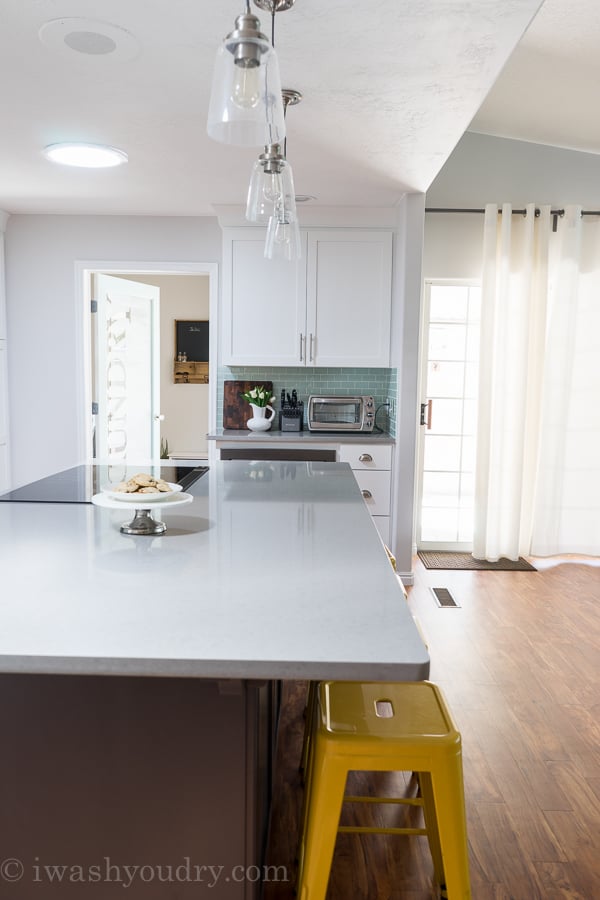
Every wall in the house got a fresh coat of paint, which really brightened up the whole place. I went for a neutral grey color so I could play with more accent colors.
Paint color: “Silver Screen” by BEHR
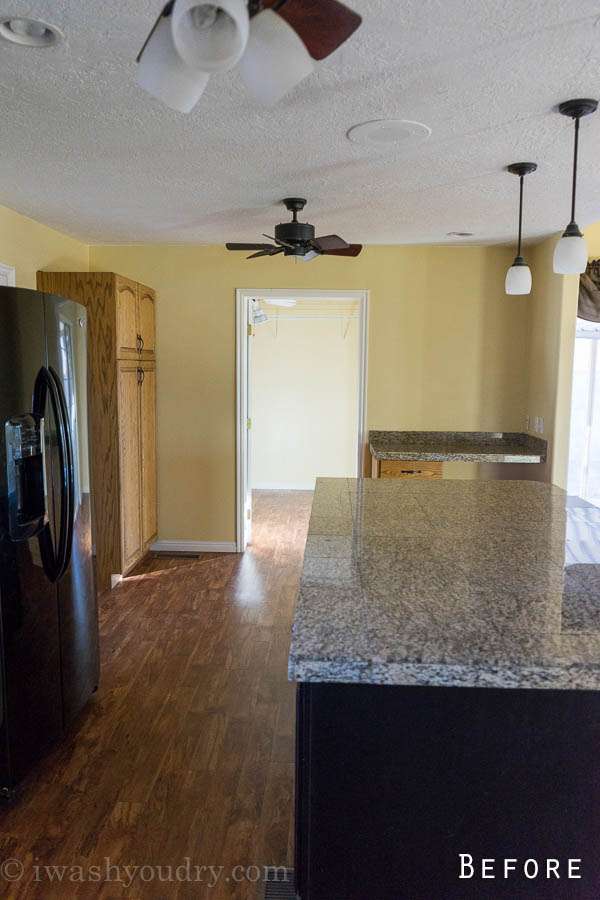
There was a lot of stuff going on up on that ceiling. All the fans hanging down really made it feel cramped. Since I couldn’t add any windows to the kitchen, I decided to take out those ceiling fans and add two Solatubes in their place. They’re like miniature skylights that reflect a LOT of natural light. They’re energy efficient and the cost wasn’t too bad ($375 ea.). I did add a light kit to each one so they turn into giant can lights when it’s dark outside (for an extra $75 ea.)
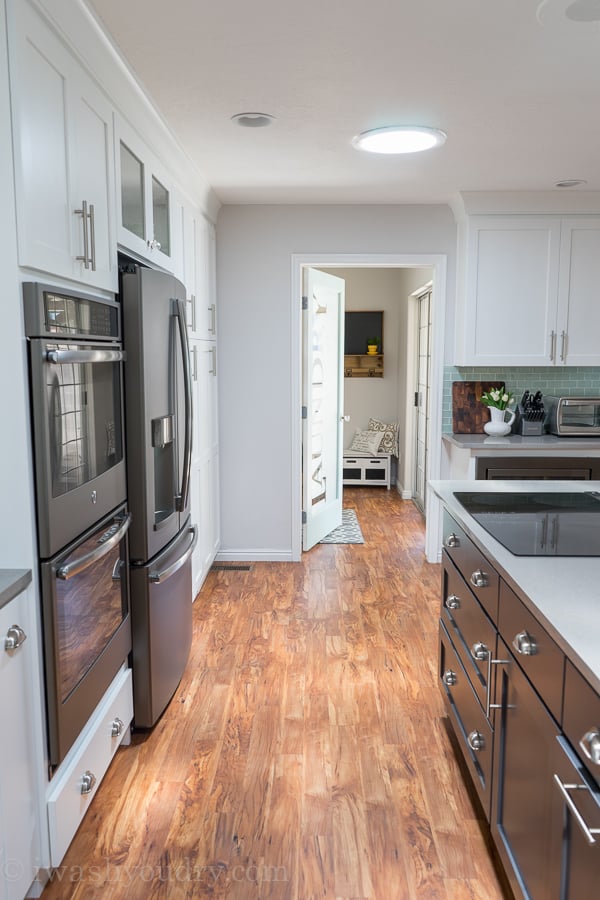
Totally worth it!
It’s literally a night and day difference!
I also added one more can light just to make it more symmetrical with the other two can lights that were already there. With those fans out of the way, the ceiling feels so much taller and the kitchen feels so big!
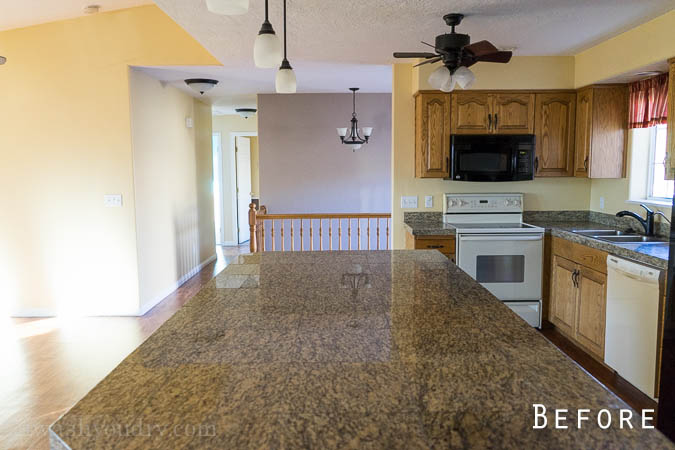
When we originally designed the cabinets I was planning on leaving the range right where it was and putting the double ovens on the wall to the right, next to the dishwasher. My husband convinced me to move the range to our rather large island, but I was hesitant because I didn’t want a range hood blocking my line of sight.
After all, I just worked so hard to get rid of those ceiling fans!
GE Appliances to the rescue!
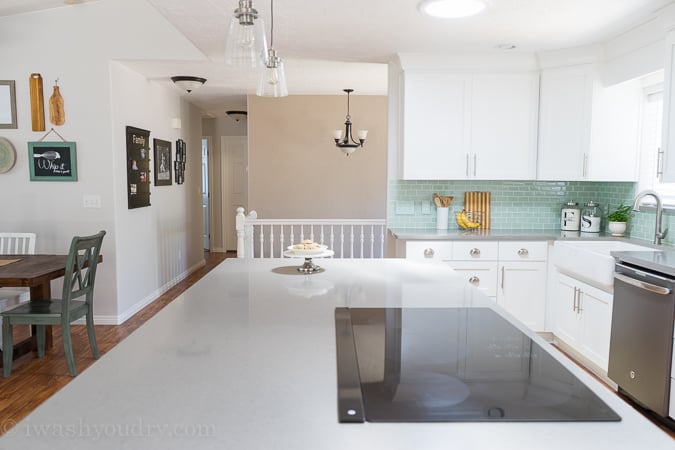
I found GE’s super sleek 36″ induction cooktop with their telescopic downdraft system and it was EXACTLY what my kitchen needed.
Now I have the clean lines, no bulky vent coming out of the ceiling and an AMAZING cooktop to boot!
We did need to hire an electrician ($200) and HVAC guy ($417) to come out and get our island ready for the new appliance, but it was worth it. It’s probably one of my favorite features of the kitchen!
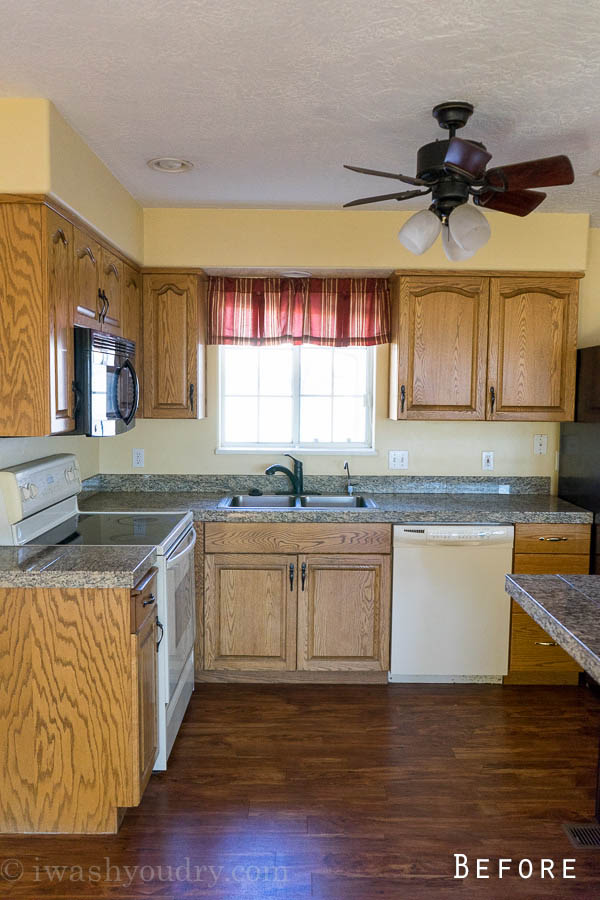
When we took out the cabinets we also took out that drop down ceiling above them.
It really made the ceiling feel so much higher!
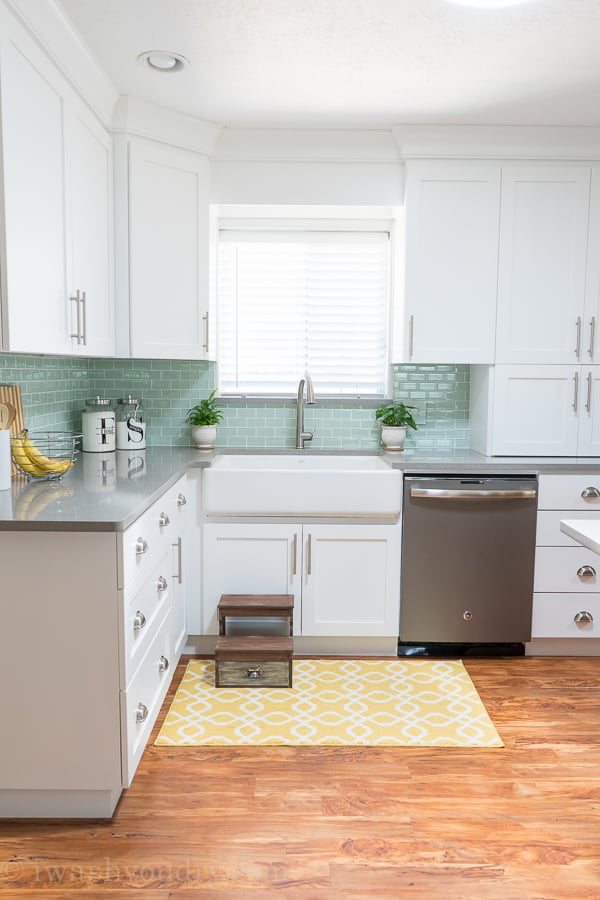
I am lucky enough to have a brother-in-law who owns a cabinetry shop (Cooper Mill, Inc.) in my hometown. He doesn’t build cabinets anymore (he focuses on refinishing and interior painting now), but I convinced him to build my new cabinets and I couldn’t be happier. The thought and detail that he put into them was exceptional. This is where the majority of our budget went ($12,500).
All of the cabinets and drawers have soft close hinges, plus he added a few upgrades along the way whenever I found something else that intrigued me on Pinterest… hehe.
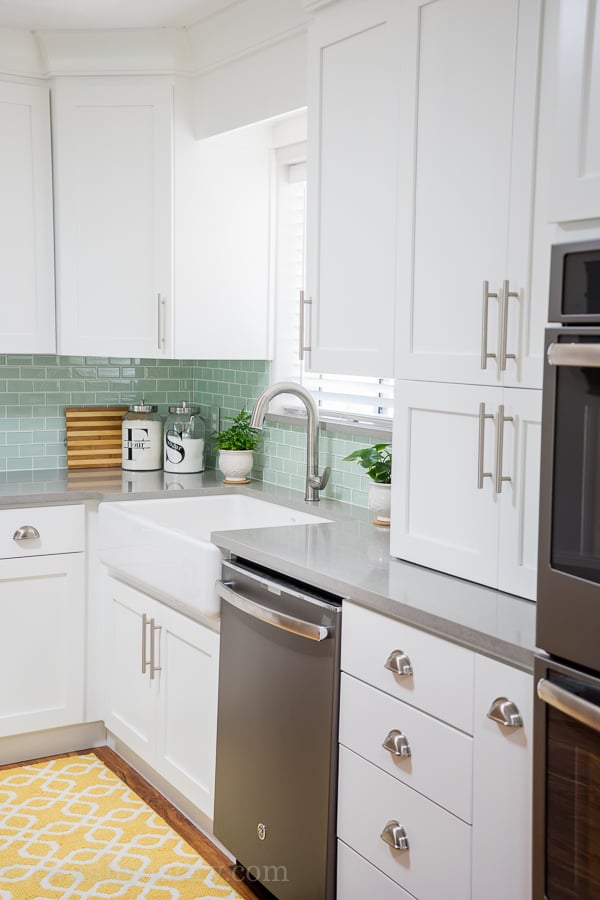
One thing you don’t realize (or maybe it was just me) when you’re planning a kitchen remodel, are all the small details, like picking out the knobs and pulls for your cabinetry.
I had a hard time with this one! I ultimately chose these satin nickel cup pulls (Overstock: $78) for the drawers and stainless steel 7″ bar pulls (Overstock: $75) for the cabinets, and I am so glad I did. I love them so much!
Sink & Faucet: Kohler
Cabinet Pulls: Overstock
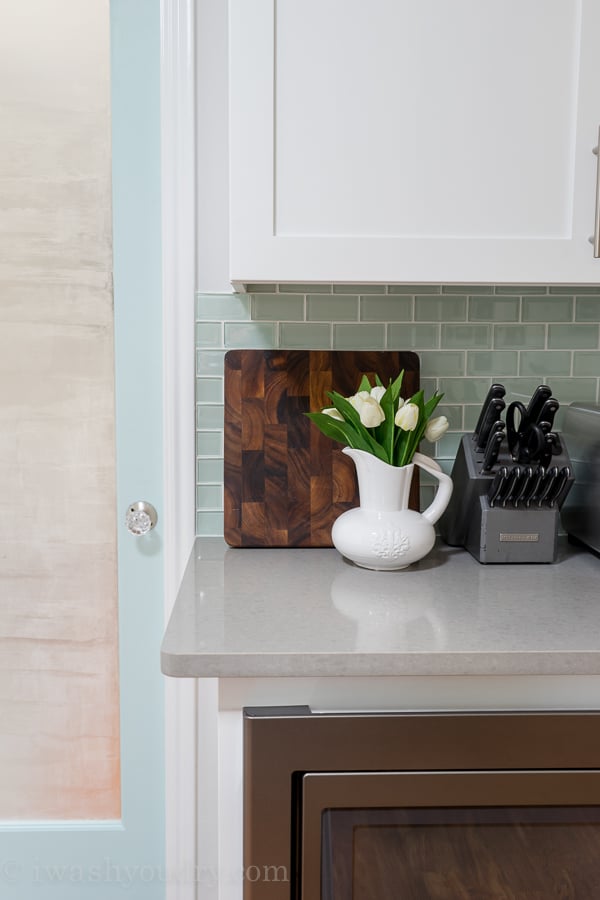
When I started planning my kitchen I had my heart set on concrete countertops. I wanted that cool grey color to coordinate with my white cabinets and cool grey wall color. I searched my town for someone to build me my concrete countertops and came up with nothing.
I was heartbroken.
Then one day I went browsing for something to replicate my dream of concrete and I found this Quartz countertop ($4200) and I literally jumped for joy. Not only did it look like actual concrete, but it is super durable and really easy to take care of!
Countertops: Quartz in “Concerto”
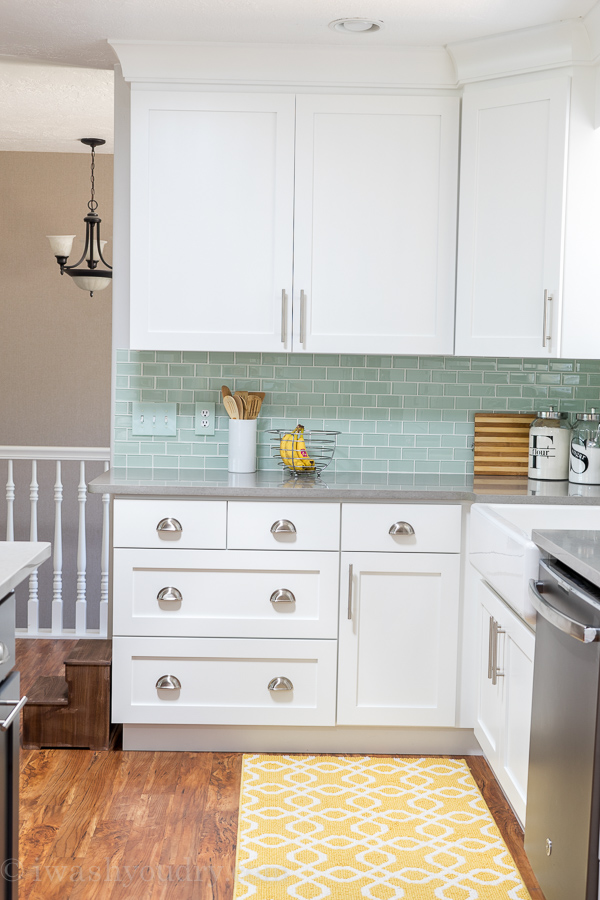
The tile backsplash ($220 + $380 installation) turned out exactly as I had imagined it would. The color really pops against the white cabinets and grey countertops. I love it so much.
Tile Backsplash: Arctic Ice Subway (12×12″ mesh mosaic tiles)
Rug: Target ($50)
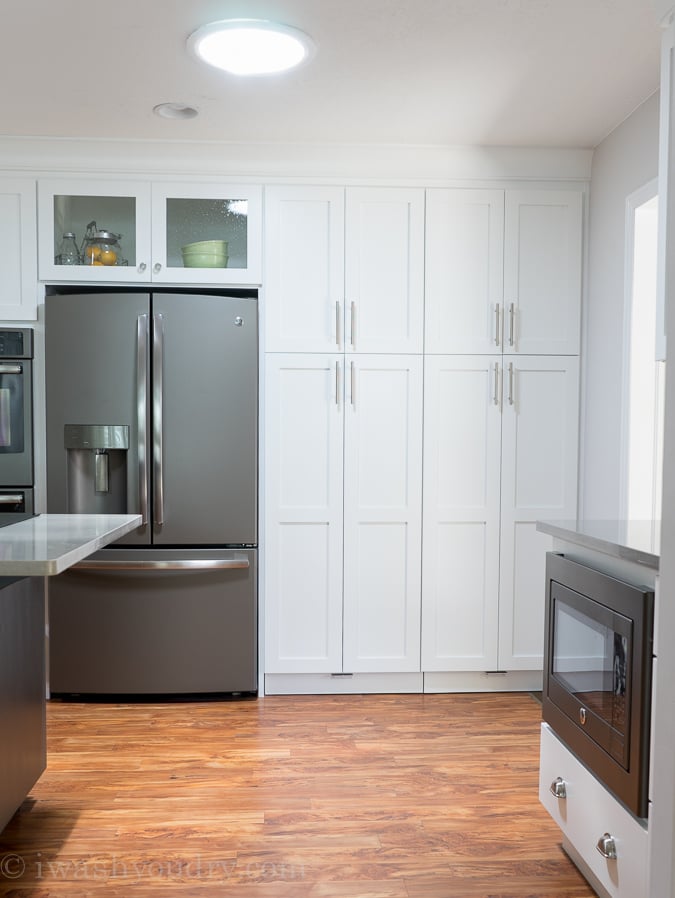
Our small pantry doubled in size and now I have way more room than I know what to do with.
Let me tell you about my new appliances!!!
They’re by GE and they are simply amazing! But what I love most about them is their color: SLATE!
NO FINGERPRINTS BABY!!!
With 4 little kids running around here, I was definitely NOT in the market for stainless steel and having to constantly wipe fingerprints off of everything. The handles are still stainless steel, so I do give those a wipe down every few days, but other than that, everything stays looking amazing, which takes the edge off of my OCD-ness.
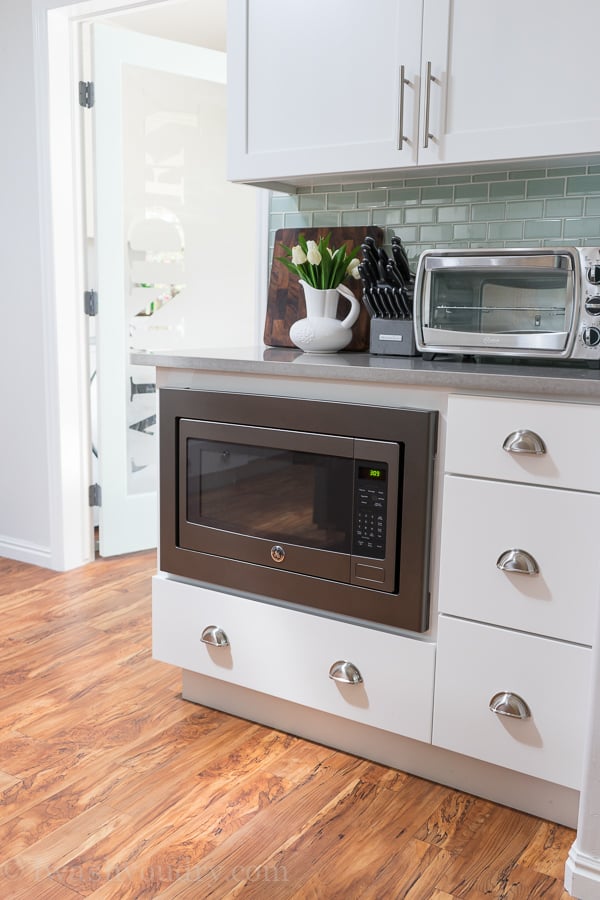
Speaking of those 4 little kids, I decided to put my microwave at their level.
Best. Decision. Ever.
They can easily heat up their food, pop popcorn, make some easy Mac, or a bowl of oatmeal without climbing on countertops or making a huge mess.
See that drawer below it?…
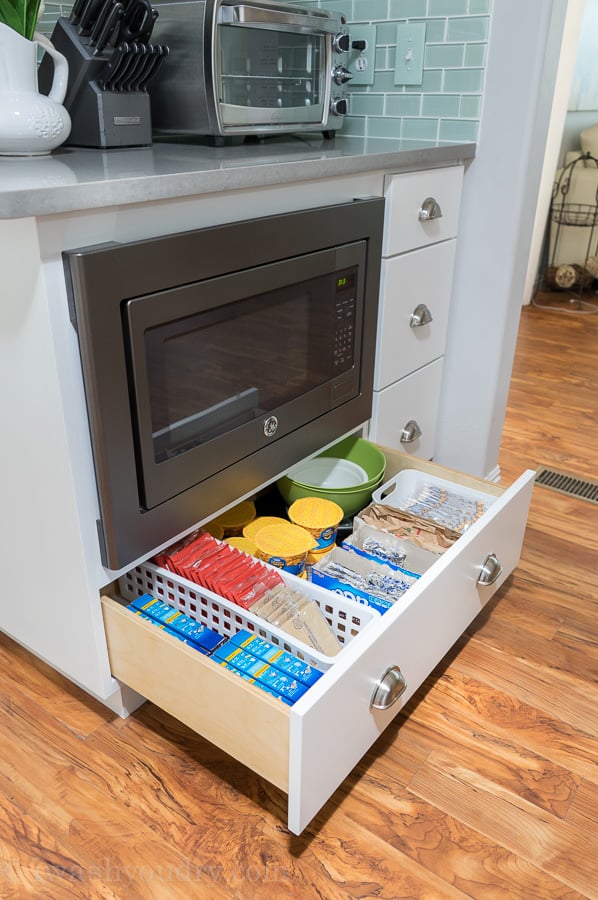
Yeah, it’s loaded and ready to go!
My kids are loving having everything they need at a level they can reach.
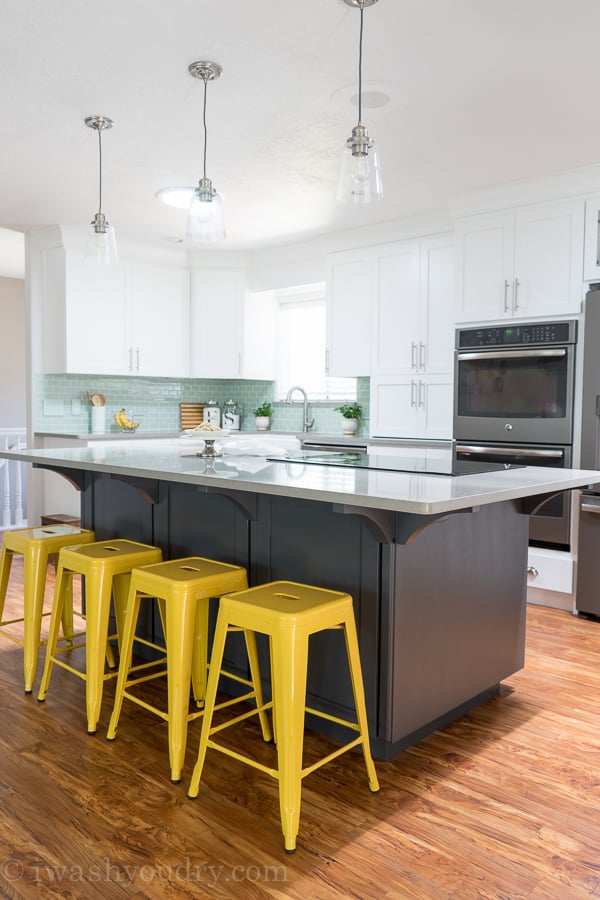
Bar Stools: Target
Pendant Lights: Capital Lighting (LightingDirect.com)
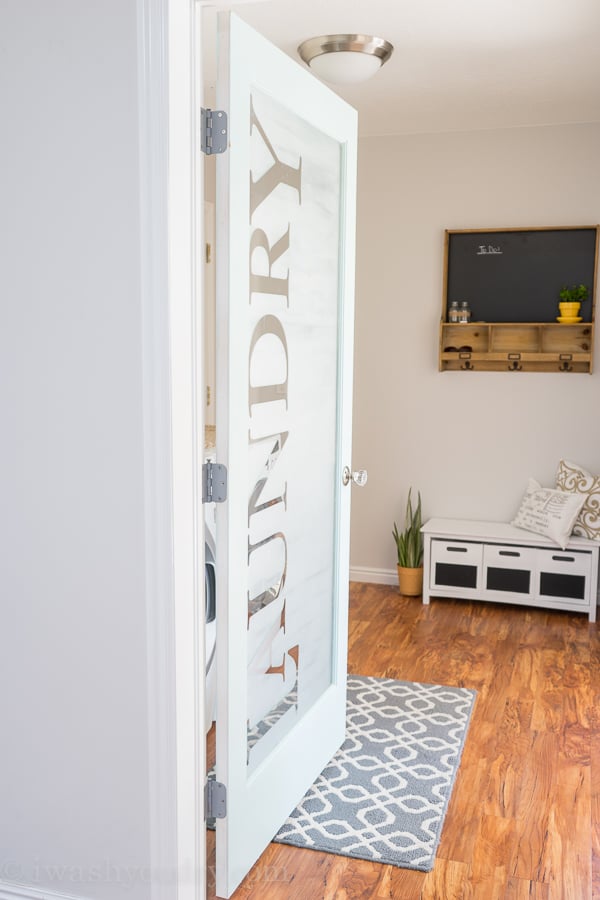
I seriously love my laundry room, which just happens to be right off the kitchen.
We have a sliding glass door just to the right, inside the laundry room, that gets amazing light. With the old door, it was always swinging shut so that natural light always went to waste. I switched out the door for a glass paned one and worked my DIY magic on it. I painted it a light blue, then had a local vinyl shop print me out “Laundry” in large letters. After I applied the letters I used some etching cream to frost the rest of the glass.
I took off the letters to give you just enough to peek into my laundry room, but it also lets in a LOT of light, while still giving my laundry room some privacy in case it’s not in tip top shape.
Rug: Target
Bench & Pillows: Tuesday Morning
Chalkboard: Thai Pan Trading
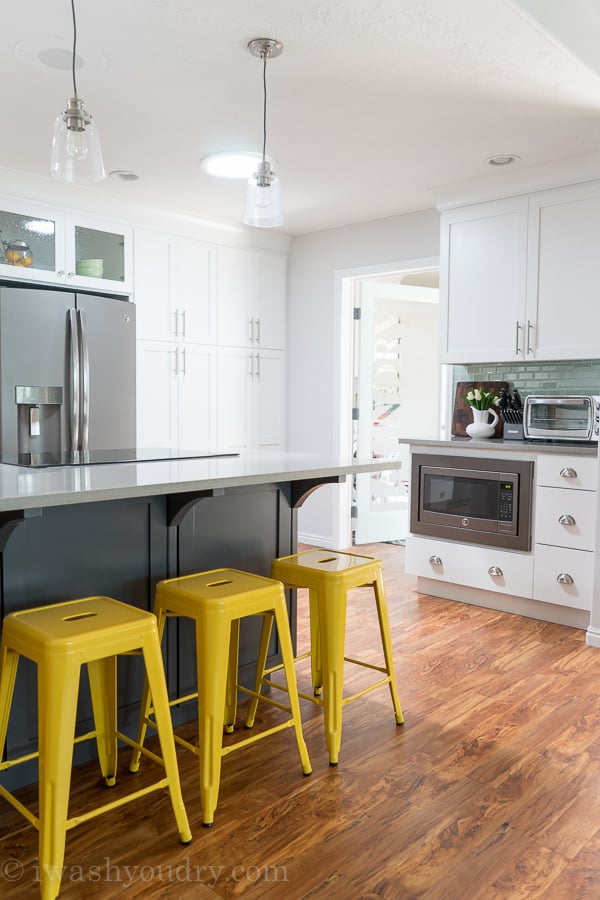
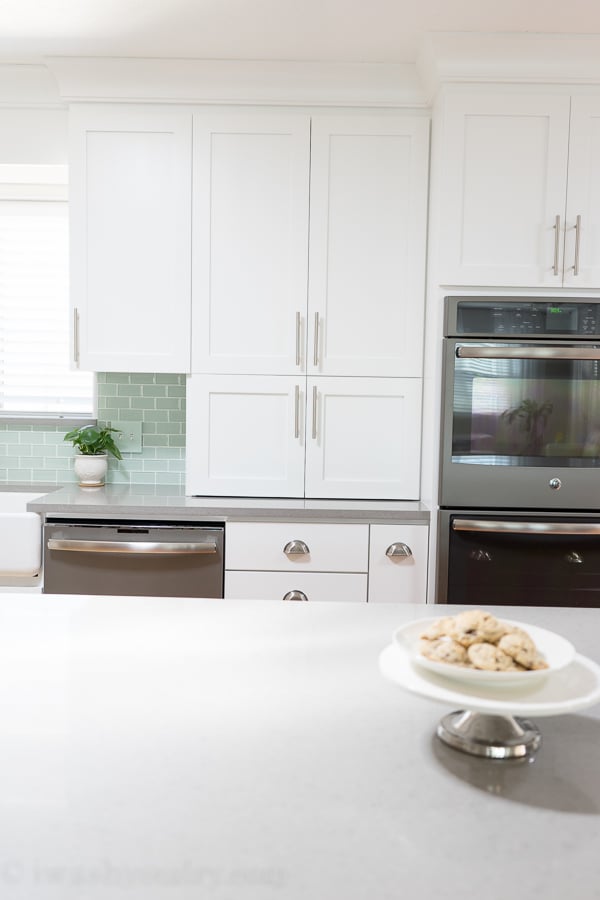
My secret storage spot for my fave small appliances!!
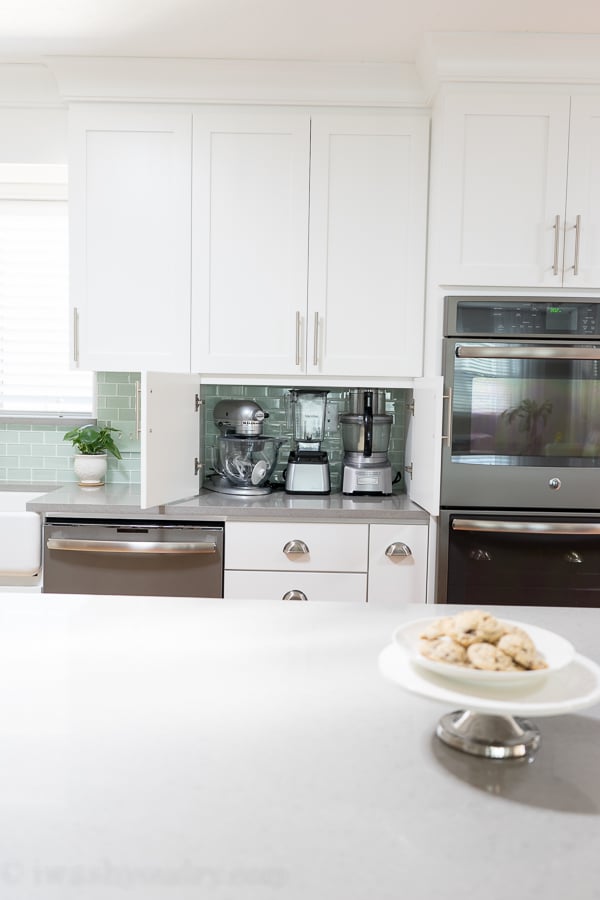
Now I can keep them out on the counter, without it looking all cluttered. LOVE!!
You guys… I’m totally smitten with my new sink and faucet from Kohler!!
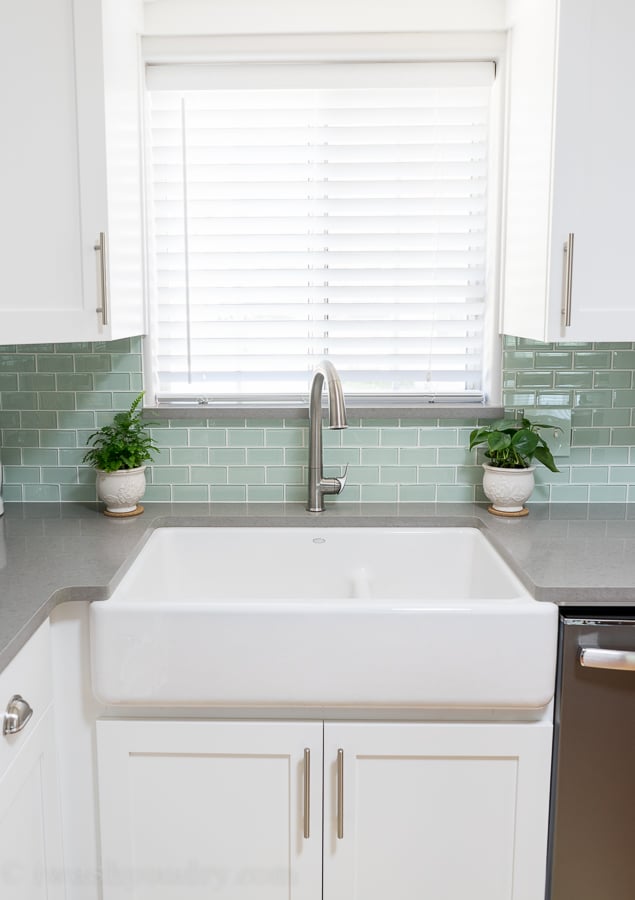
This apron front cast iron enameled sink has a “smart divide” in it, so I can still fill up a small part of the sink if I need to, without having to fill up the large basin and waste water.
The faucet is a touch-less one! It’s life changing. Seriously.
I’ll share more about these two items later next week. They’re just too amazing to not share!
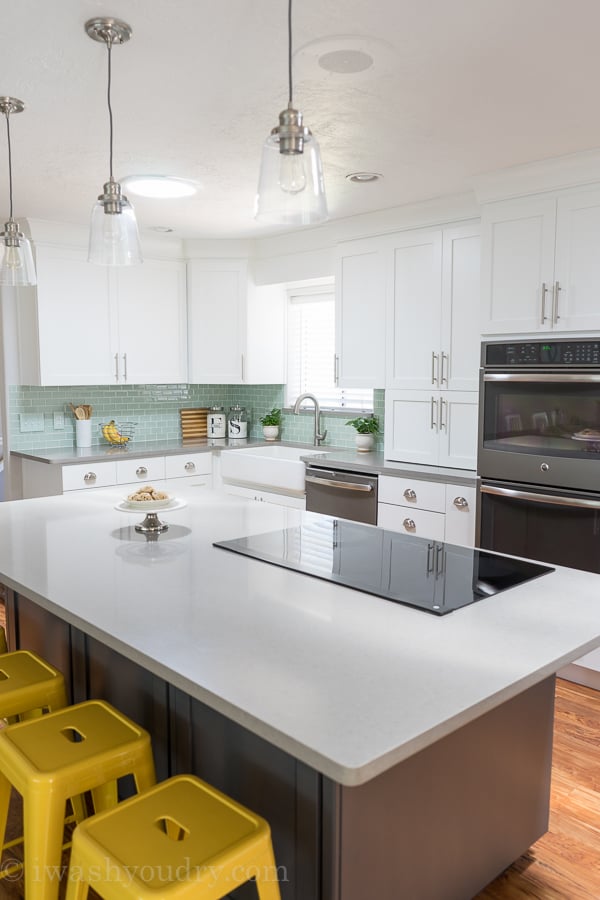
I can’t even tell you how much I love my new kitchen. This is where I spend the majority of my day, so I wanted to make it something that was not only gorgeous but also functional. I’ll share more of how I achieved that later on.
So for now, here are just a few process pictures to show you how we got here…
First step: Move that old and awkward door going into the garage!
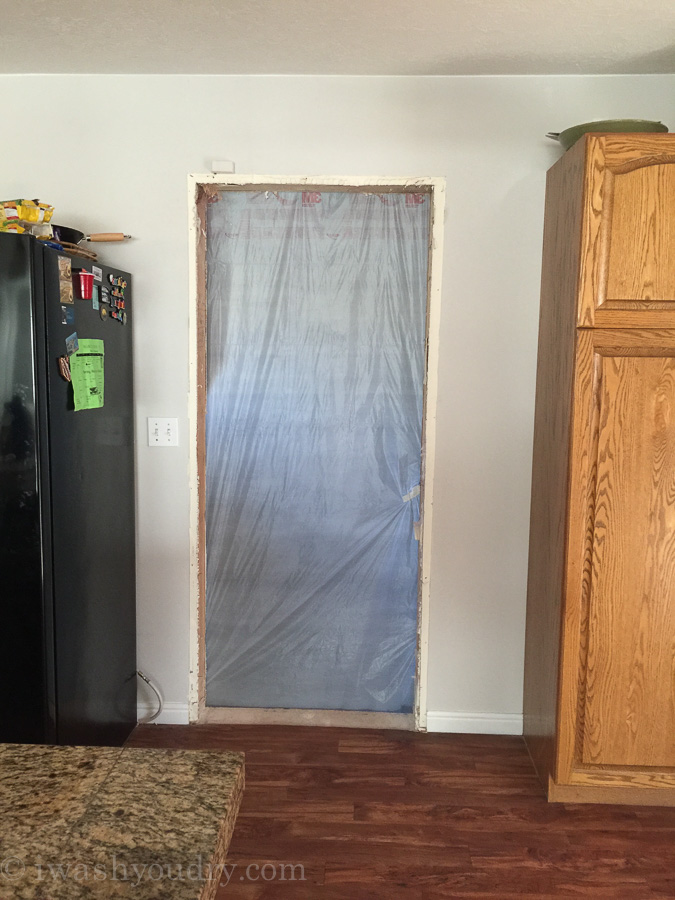
Notice how dark it is before the Solar Tubes are installed? This was taken mid-day!
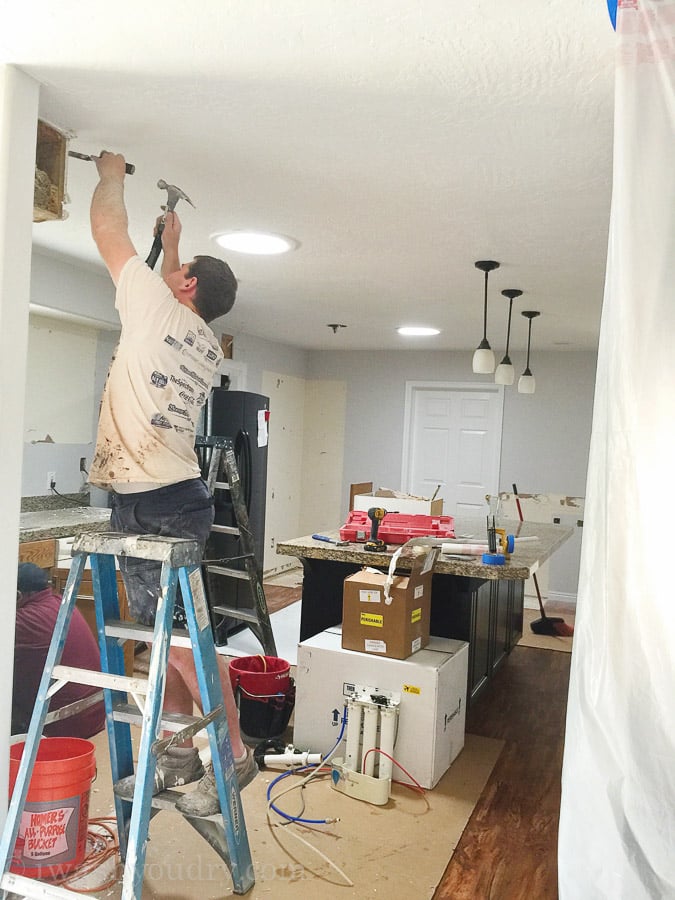
Electricians working on moving some wires around!
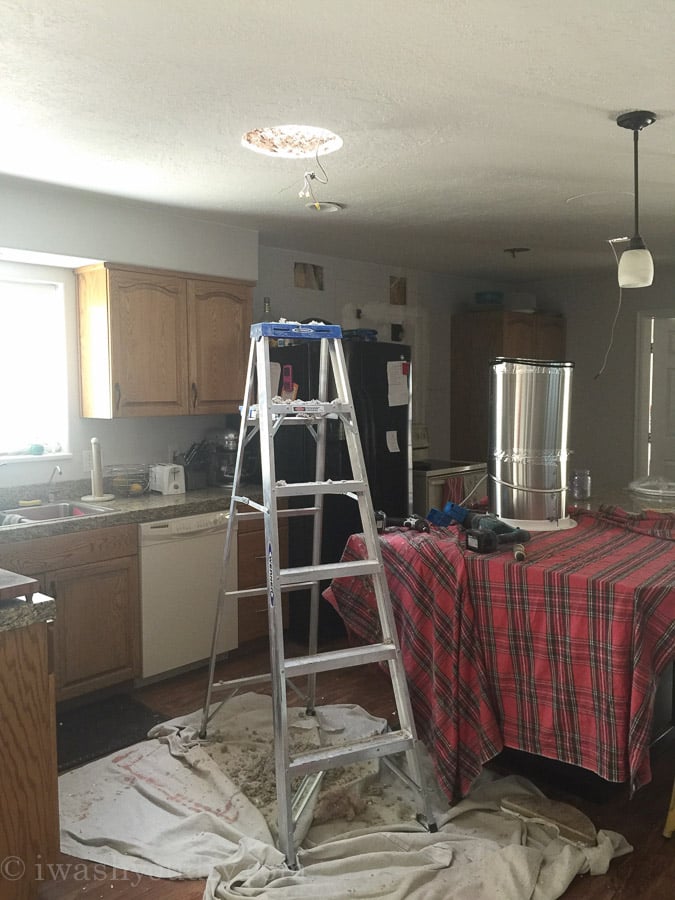
Solar tubes going in! Let there be light!
Bye bye old oak cabinets and weird drop down ceiling!
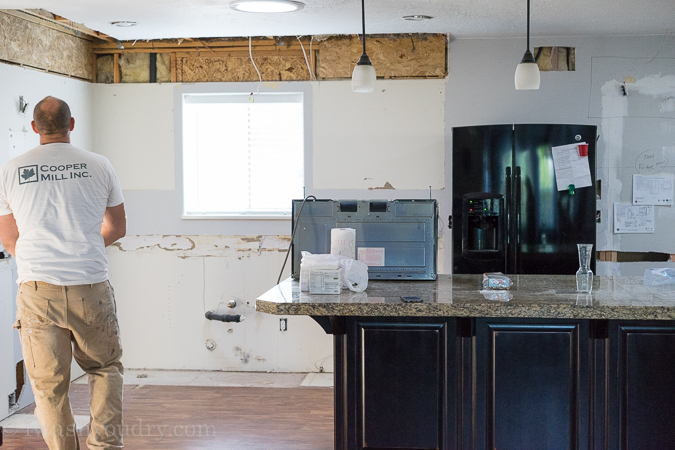
Clean slate! Ready for a facelift!
My new custom cabinets arrive! (they’re massive!)
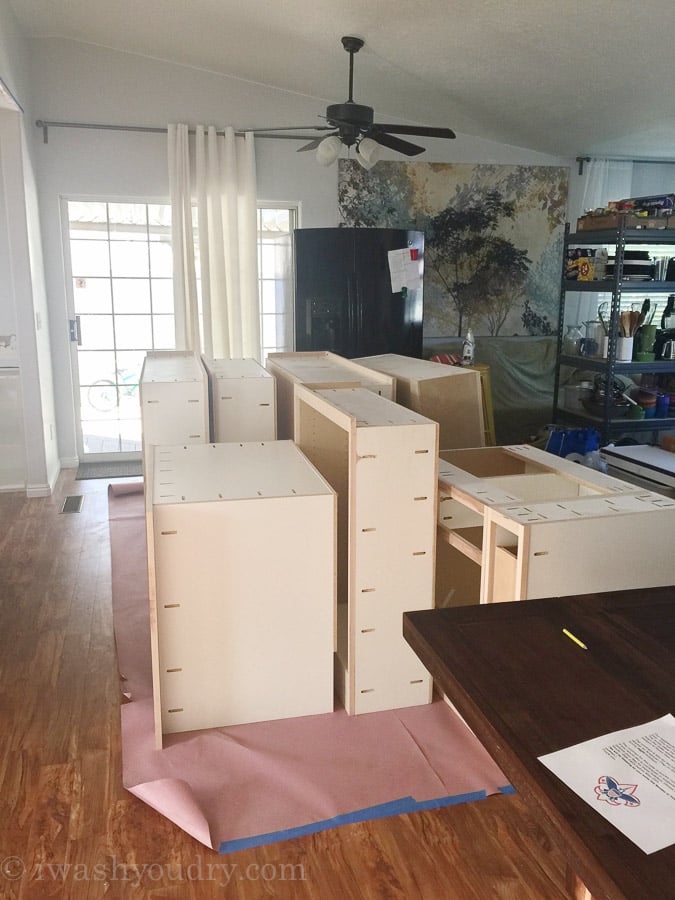
The new cabinets and crown molding are installed!
They get painted white after they are installed (on-site) for optimal coverage.
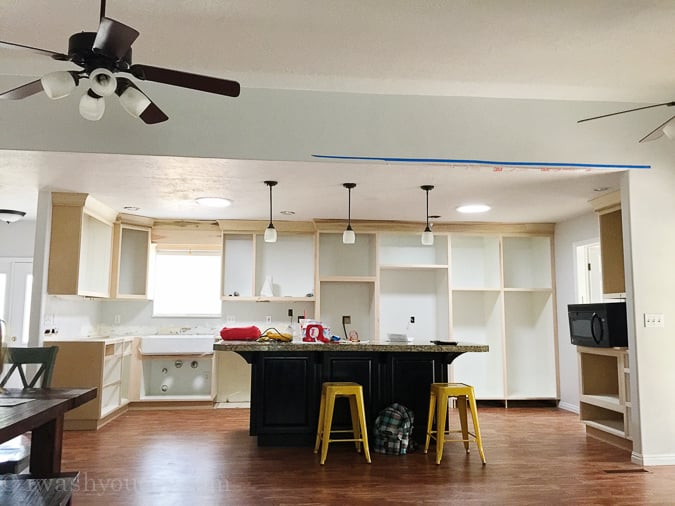

A huge THANK YOU to GE Appliances for providing me with my gorgeous new appliances and Kohler for providing me with my awesome new sink and faucet.
Stay tuned for more reveals (and giveaways) next week!
Thanks for stopping by my kitchen! Let me know what you think! 🙂
Make sure you don’t miss a thing! Follow I Wash You Dry here:
FACEBOOK | PINTEREST | GOOGLE+ | TWITTER | INSTAGRAM | BLOGLOVIN




Simply Beautiful !! so well thought out and Planned, And yes we all love the laundry room door
I would have loved to have seen the whole Laundry room
was the kitchen blind custom made ?? ? ? Thanks 4-22-23
Simply Beautiful !! so well thought out and Planned, And yes we all love the laundry room door
I would have loved to have seen the whole Laundry room
was the kitchen blind custom made ?? ? ? Thanks 4-22-23
Beautiful! Can you please tell me the font you used for the Laundry letters?
Unfortunately I do not remember the font used. I’m so sorry!
It looks fantastic….great makeover! Love the colors…..well thought out layout, too.
One thing, with your large family, surprised you chose a medium size refrig ….you must be well-organized!
We actually have a second fridge in the garage, so it works. 😉
BEAUTIFUL!!! You’ve inspired me to change a few things on my kitchen. Love how you removed the 70s soffit above the cabinets. Totally doing that now. What color was the paint you used for the cabinets? It really contrasts well with the stianless.
Wonderful! I hope it turns out well!
Hello! I love your laundry room door! Do you happen to have a step by step tutorial on how you did it? How did you apply the etching cream? I read through the comments and I read that you rinsed it off. Did you just rinse it with water?
I didn’t do a step by step tutorial, but I can tell you what I did. I actually had two people help me since it was such a large glass section and etching cream is time sensitive. We covered the wood parts in tape and plastic to protect it and took it outside into my front yard. Then we each took a section of the glass and used the same paint strokes to paint the glass with the etching cream at the same time. We let it sit on there for maybe 5 to 10 minutes, then used a hose to wash it off. It was a little bit of work, but paid off in the end! Hope that helps!
Hello! Love your kitchen and laundry room door. Do you recall how much etching cream it took? Also, did you do the etching cream to the front of the door or back of the door?
Thanks!
Thanks Lindsey! I’m sure you could put the etching cream on either side of the glass. I had it on the outside (towards the kitchen). I believe it took me at least two of the smaller jars of etching cream.
Thanks for your quick response! I just put the same door up going to my basement (kept glass as is) and my husband just ordered the door for my laundry room!!! So glad I found your blog!!
I noticed all the electrical plates color match the backsplash; did you paint them? or order them from ????
We happened to luck out on that one and found a plate from Home Depot that was almost identical to the tile. They were actually made of a plexi-glass material and not actually tile. I don’t think they currently sell them though.
Can you tell me what font style was used for the vinyl letters on the laundry room door please?
Where did you order your letters from, what size are they.
Love it
Thanks! I had a local place make them up. They are about 12 to 14 inches tall. If you’re going to have them made, you can look at places like Etsy and have them made according to your door size. Hope this helps!
I am in love with your kitchen and beyond jealous of your pantry! We just bought a house and I have no pantry at all (everything else is perfect).
BUT where did you move your garage door?!
Thank you! You inspire me!
Love your kitchen! I am hoping to remodel my kitchen next spring. I have been trying to do this for the past couple of years and because of one thing or another, I have not been able to. I plan to completely rearrange the kitchen. I know the cost is going to be out the roof, but I know in the end it will be worth it! Thank you so much for sharing! Also, I love the Laundry door! May I “steal” your idea? I want a frosted door for my bathroom as well, just for light purposes. Again, Thank you for sharing!
Having your kitchen the way you want it is worth every penny! I hope it goes well for you! And yes, of course you can steal the door idea. That’s why I posted it! 🙂
What are the measurements for the letters on your laundry room door?
I’m interested in creating the laundry door. Please send me instructions.
Hi Shawn,
I LOVE Your Laundry room door!
So much so that I want one just like it….. can you possibly send me info on how you made it (etching) and how I would go about the wording.
Thank-you
I love the laundry room door and we’re trying to find the right one for us. May I ask, does it show kids fingerprints? I’m concerned if we did something with glass top to bottom that it would show a lot of handprints and grime all of the time.
Hi Kelsie, I never had an issue with finger prints on our window. The frosted glass seemed to hide anything. But my kids aren’t super young either (I think my youngest was 4 when I put this door in), so I didn’t have a ton of baby hands all over it. I did wipe it down every 2 weeks with my regular cleaning schedule, so that also helps. 🙂
Do you know what size the letters are?
What color is the cabinet paint you used? Thanks.
Hi! Beautiful kitchen! Working on designing my own right now, and I’m stuck on the cabinet layout. Can you share photos of where you put your glasses, plates, bowls, etc.? What about drawers for cooking and eating utensils? The dimensions of our kitchens will be similar, so I appreciate your thoughts! 🙂
What size was the letters for your laundry door?
Love the kitchen! Girl, you should be SO glad you don’t have concrete countertops. We purchased a home with concrete countertops two and a half years ago, and they are a nightmare — especially with kids! They’re constantly staining and always look dirty. They also will crack in places over time as the settle, and the cracks then become a grime crevice. I’ve tried bleaching and resealing them, but there are stains — like a ring from a teacup — that just are permanent. Can you tell I hate them? Ya… you made the right choice!!
Oh my gosh! That sounds like a nightmare! Thanks for filling me in on that, because I was still considering it in the future… not anymore!
Where did you get the laundry door?
I bought the door at a lumber store in town, with a plain glass middle. Then I had large vinyl letters printed to say “Laundry” and stuck them on the door. Then I used etching cream to rub on the glass to give it a frosted look. Once that was done I removed the vinyl letters and hung the door! Hope that helps!
Hi Shawn, I really love your kitchen makeover and I especially love your laundry door. Can you remember how long you left the etching cream stay on the door, I really considering trying this. Nice kitchen!
It was only left on for a few minutes before we washed it off. You have to act quick! I painted it on with two friends at the same time in the same brush motions (we sectioned off three parts to make it all go on at the same time). Then I used a hose to wash it all off quickly. Hope this helps!
Your kitchen is absolutely GORGEOUS and is exactly what I am planning to do to my own kitchen in the very near future.
I am planning on using this same backsplash tile and I was just wondering if you remember what colour/brand of grout you used
Thanks so much
I love what you have done in your kitchen and you have a lot of jealous women on your hands. The laundry room door is the only project that is possible in our home since it is only a few years old. However I love your painting near your sliding doors in the picture with the delivered new cabinets. I hope it is fairly new so you can tell me where I might find one like it. Thanks.
I got that print at IKEA! It’s one of my favorites!
SO gorgeous!!! I don’t know if kitchen envy is a thing but…wait, yes I do know. It absolutely is and I’ve got a major case of it!!!! I think I’d just bring a sleeping bag in there and never leave. Congratulations!
Whew!!!! What a relief that it’s all finished. Looks absolutely fabulous. Congratulations.
Hello, what paint color did you use to match your light switch/ outlet covers? It looks perfect and I am using the same backsplash in my kitchen remodel. very beautiful!
The outlet covers were a happy accident! I found them already the same color as my backsplash at Home Depot. This was almost 2 years ago now, so I’m not sure if they’re still available.
Hello! What color did you use to match your outlet/light switch covers? It looks perfect and I’m using this this tile backsplash in my kitchen remodel as well!
Can you tell me about how big your kitchen is so I can get some perspective? 12×14…… etc…? Love it all by the way.
Hi Jeanie, my kitchen is about 19×10 feet. Hope that helps!
It’s all so pretty. I especially love your countertop choice. My obsession is your laundry room door. I would love to replicate it. Where did you buy the glass door? About how much?
I love your kitchen!! Can you share what your budget was and what was the final cost?
My budget was around $40K, and I think I was right about there with all the appliances and everything.
This turned out beautifully! What are the dimensions of your kitchen and the island? My mom is planning a kitchen reno and this looks similar to her ideal layout.
Are you finding the downdraft range vent works well? Does it get tall enough for a stockpot?
My kitchen island is large! It’s about 10 feet x 4 feet. I love the downdraft system and while it’s not super tall for the bigger stock pots, I find that if I put the pot on the burners near the downdraft it’ll still suck up the steam.
Hi Shawn, We will be building our home soon and can you explain what a downdraft is?
Lovely kitchen—my favorite part is the laundry room door! Soooo cute!
Thanks!
Do you have a DIY post for that laundry room door?? I love it and would love to try something like that for my laundry room
I don’t have a step by step tutorial, but I can tell you that I had a vinyl letting store print out the letters for “Laundry” and then I used etching cream (http://amzn.to/2ueKfN9) to brush all over the clear glass. Make sure to tape off the wooden door parts so they don’t get any etching cream on it. Also, I took the whole door off of the wall and placed it outside to do this, then washed off the etching cream with the hose. Once it was all dried off I peeled off the letters. Hope this helps!