With the 4th of July just around the corner, it’s time to start planning the party.
I have partnered up with Wilton, to help you create one Festive Fourth.
{Well… at least one out-of-this-world cake}
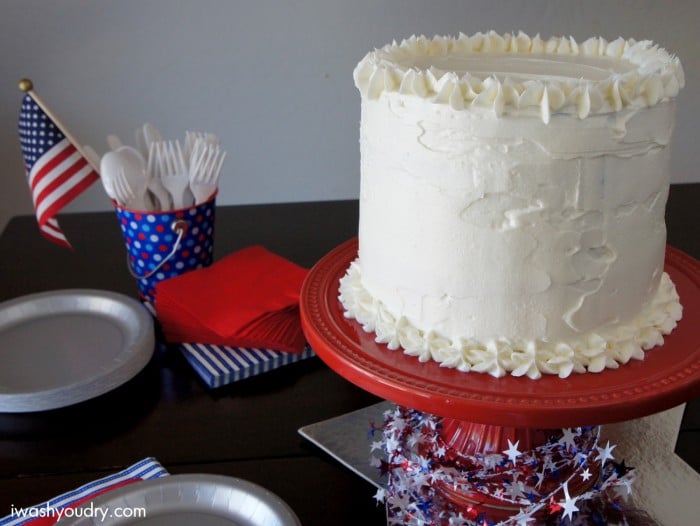
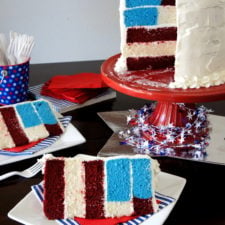
Isn’t she a beauty?
The best part about this cake is what’s hidden on the inside.
It’s sure to shock your party guests, and leave them begging to know how you made it. You’ll be the star of your 4th of July party for sure. Forget about the fireworks, everyone will be staring at your cake.
And here’s the kicker… it’s actually extremely easy to make, and Wilton has all the tools you’ll need.
Ready to see the inside?
You may need to sit down…
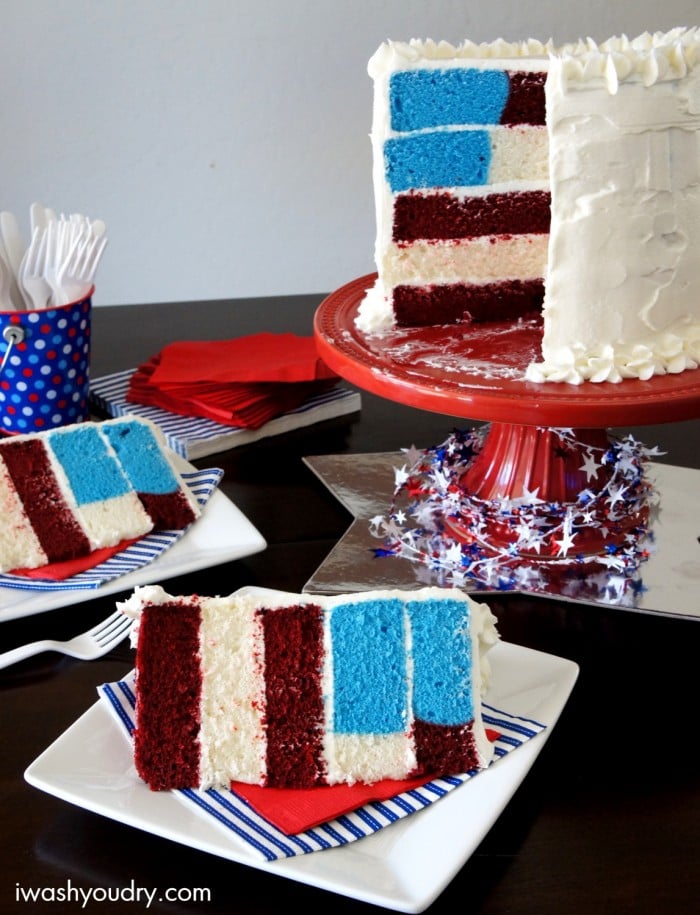
Crazy right?
There is an American Flag right inside your cake.
And I haven’t looked into it, but I’m 97% sure it’s not illegal to eat an American Flag. {don’t quote me on that}
Before you check out, and start thinking, “This just looks too difficult to make.”
Stop. Cause it’s totes easy and I’m going to show you how.
Right. Now.
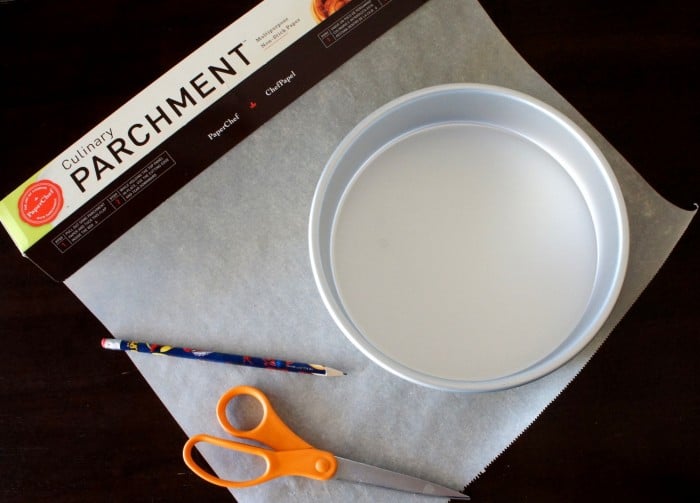
Just a quick tip for any sort of cake baking. Spend the extra 3.42 minutes to trace out circles of parchment paper to fit the bottom of your cake pans.
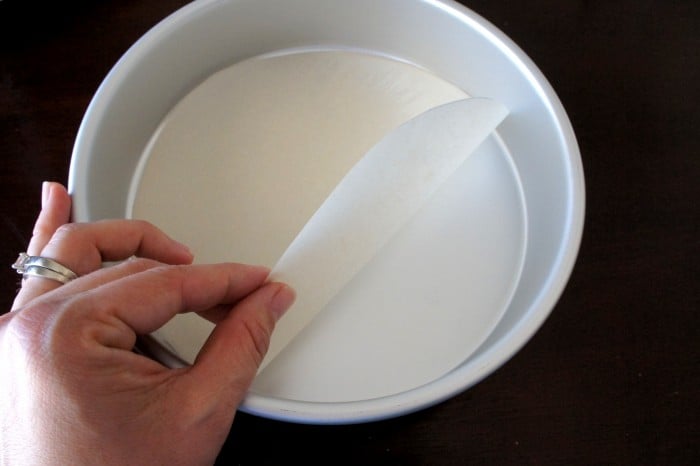
This one step can save you tons of heartache when it comes to getting the cake out of the pan. With the paper, it slides right out, and the paper peels off like butter.
It’s worth it.
Let’s continue shall we?
This is a 5 layer cake. It’s a mix of red velvet and white cake. The blue portion of the cake is simply a white cake turned blue with some Wilton Icing color. Since it’s 5 layers, and I am all about easy, I did the boxed cake mix thing.
We’re going to need 1 box of Red Velvet Cake Mix, and 1 1/2 boxes of White Cake Mix. I made this cake with an 8″ round pan (which is also up for grabs in this giveaway), but you can also use a 9″ cake pan if you prefer.
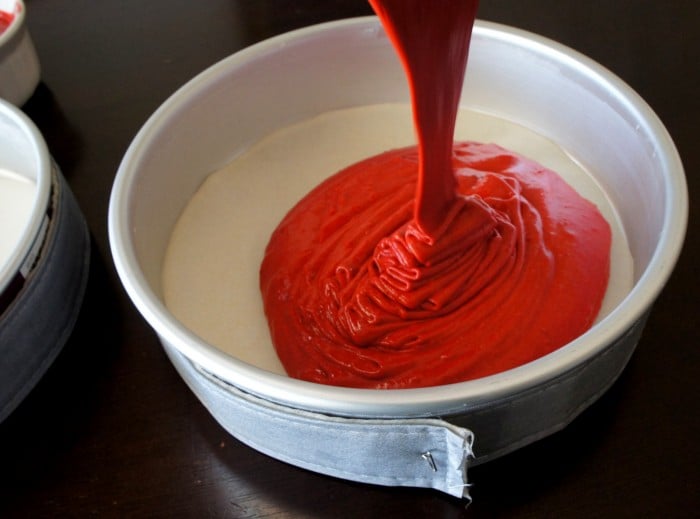
Since there are two layers of Red Velvet Cake, mix up your cake mix according to the box instructions and remove 1/2 a cup of cake batter and set it aside for later. Pour the remaining batter into two cake pans and bake.
See that little strip of fabric around my cake pan? That my friends is one genius idea from Wilton. They are called Bake Even Strips, and they do exactly what they say. By soaking them in water and wrapping them around the pan it helps the cake to bake more evenly. Which results in a more even cake with less “dome” to trim off later.
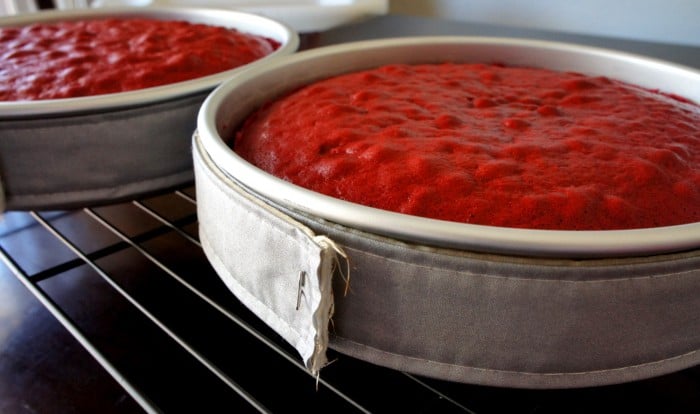
They are reusable, so once these cakes were done baking, I removed them from the pan, soaked them again, and I was ready for my second batch of layers.
Remove the cakes from the pans once they have cooled for about 15 minutes, and let them cool completely on a wire rack (also up for grabs in this giveaway).
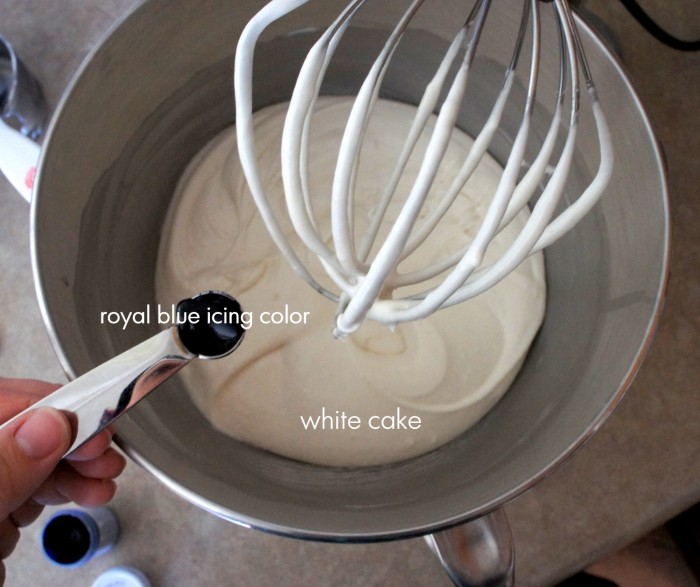
Now we take 1 whole box of White Cake mix, AND 1 1/2 cups of cake mix from another box of White Cake mix. Add ONLY egg whites, not yolks to the cake, along with the essential water and oil, and mix it up.
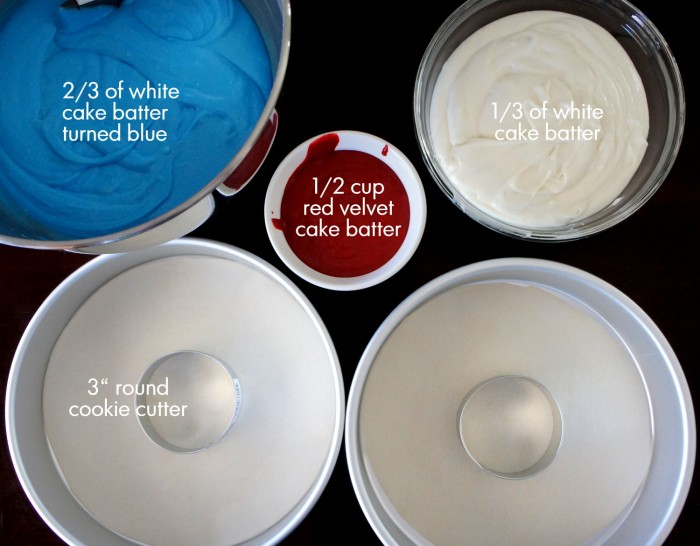
Now remove approximately 1/3 of the cake batter into a separate bowl and set aside for later.
To the remaining 2/3 of cake batter add some Royal Blue icing color and mix until the color is blended completely.
Still with me? Good…we’re getting to the fun part.
Now we are going to make the blue layers of the flag cake.
Place a metal round cookie cutter in the center of your cake pans (don’t forget the parchment paper!). I used a 3″ round cookie cutter, but in all honesty, a 4″ would have worked better for an 8″ round cake pan. And if you’re using a 9″ cake pan, use a 5″ round cookie cutter. Wilton has this pack of Nesting Cookie cutters that contains 4 different sizes, up to 5″.
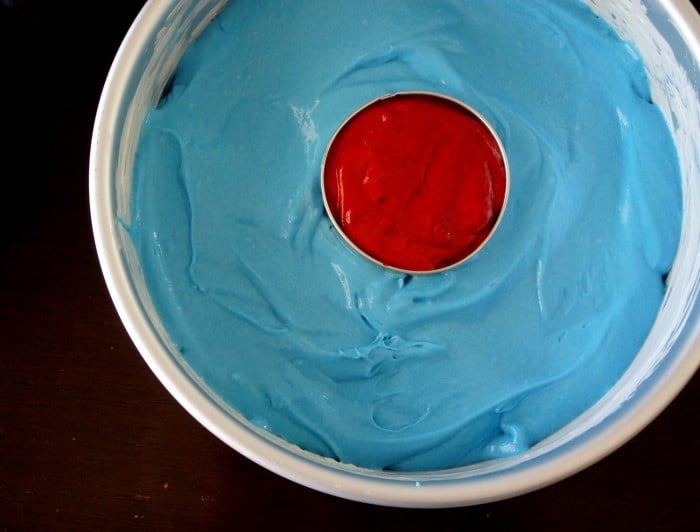
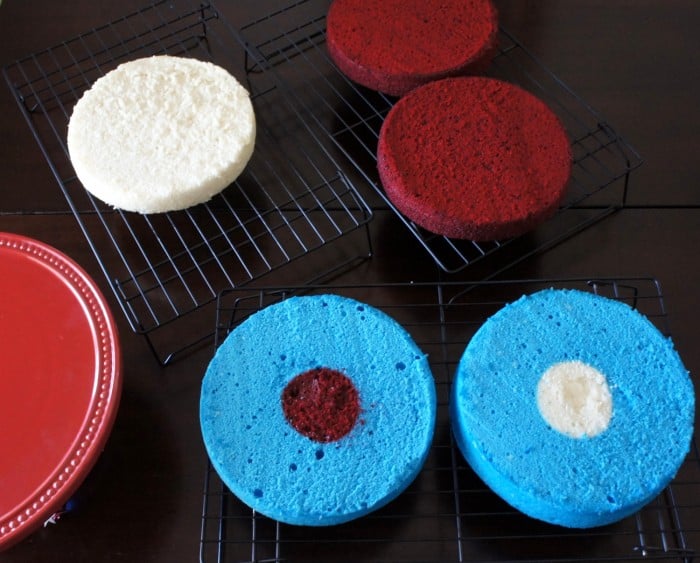
Carefully place the 1/2 cup of Red Velvet cake into the center of the cookie cutter, being cautious not to move it. Then fill in the outside with half of the blue cake batter.
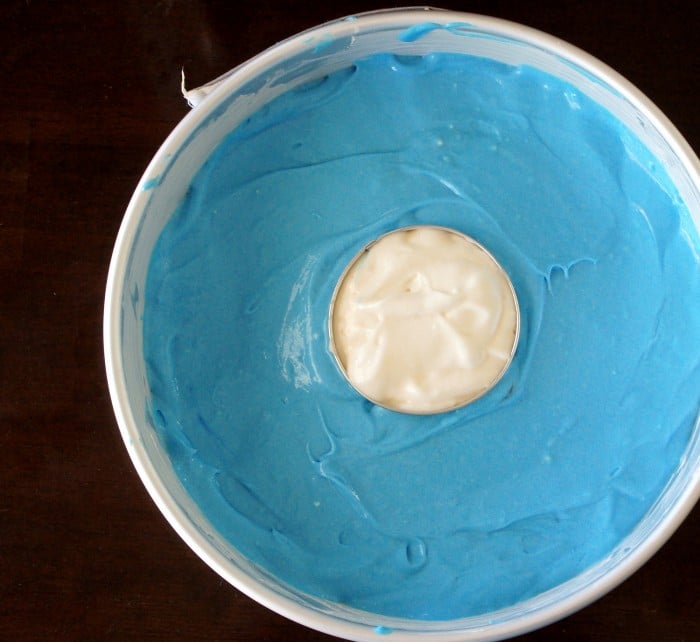
Use about 1/2 cup of white cake batter to put into the center of the cookie cutter, and then fill the outside with the remaining blue cake batter.
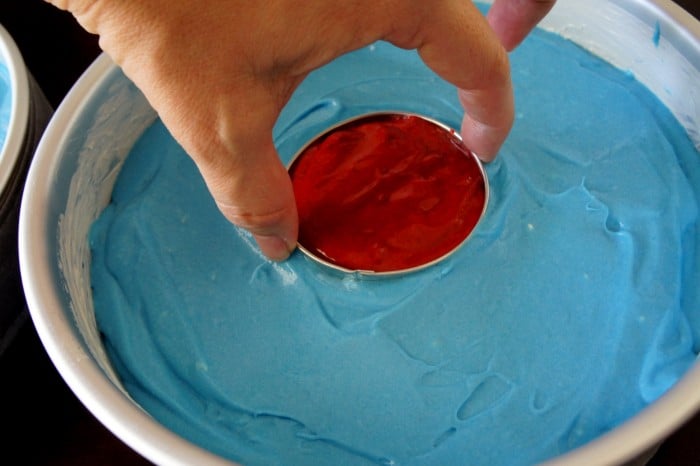
Since we don’t really want to eat any cookie cutters today, let’s carefully remove them. Grab the outer rim of the cookie cutter and very gently pull straight up.
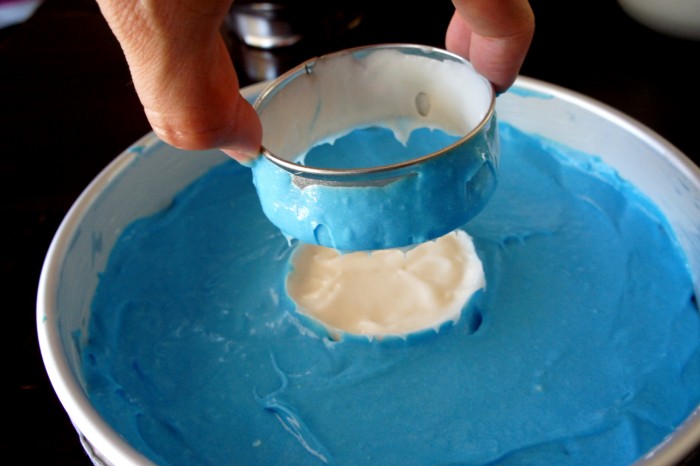
Very nice!
Make sure to wrap your cake pans with the Bake Even Strips again, and carefully place them in the oven. Once they are done baking let them sit in the cake pan for 15 minutes, then remove to cooking rack to cool completely.
Pour the remaining White Cake Batter into a prepared pan, wrap, bake, cool…you’ve got the routine by now.
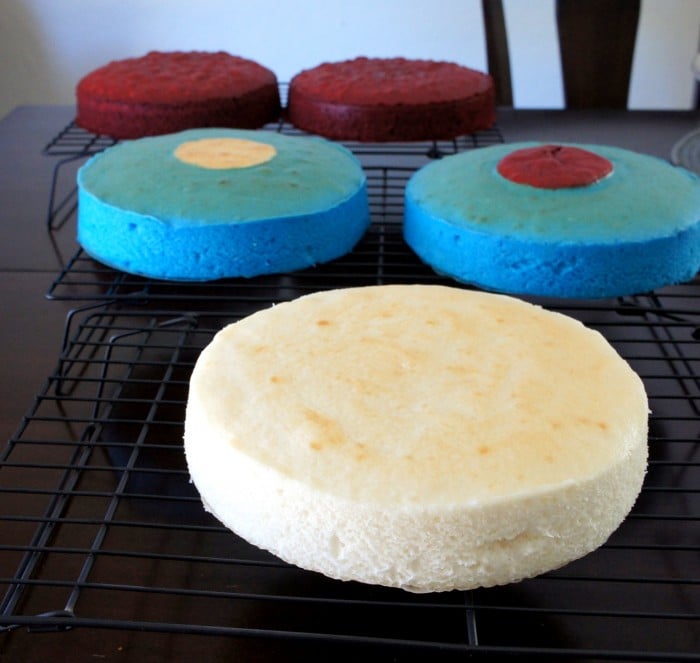
While the cakes are cooling, whip up a quick batch of Classic Vanilla Buttercream Frosting (recipe below).
Trim the tops of the cakes to make them completely flat.
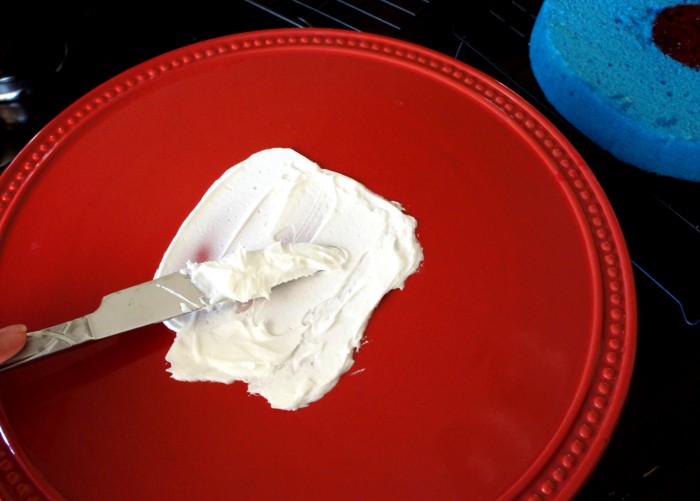
On your cake stand, or plate, or where ever you are going to place this glorious cake, smear a tiny bit of frosting on the base to hold the cake in place.
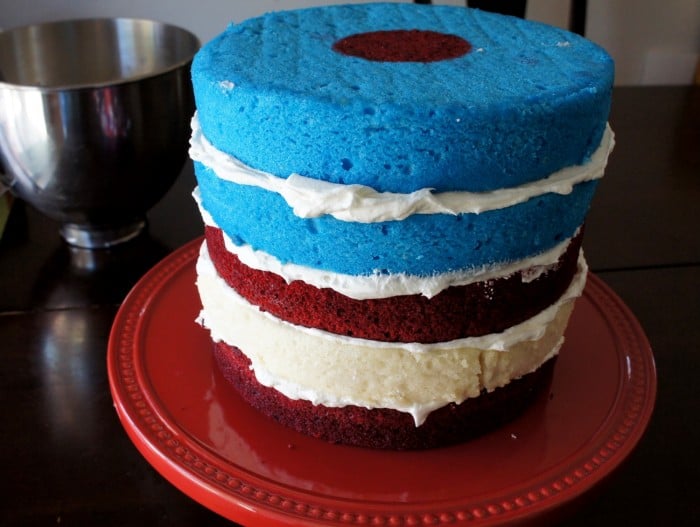
Then begin assembling the layers like so…
Red Velvet.
frosting
White Cake.
frosting
Red Velvet.
frosting
Blue Cake with White Cake center.
frosting
Blue Cake with Red Velvet center.
Almost done!
Now, just cover this beauty in the remaining frosting.
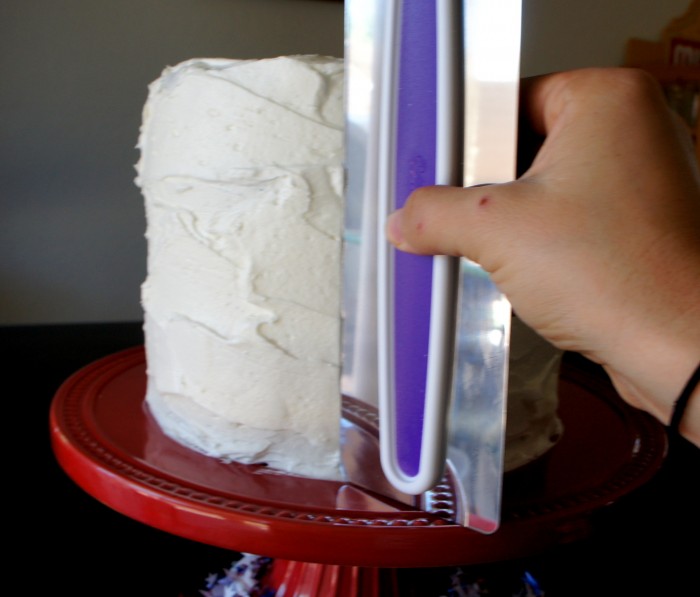
I apologize for the blurriness of this picture, I was being all professional and taking pictures with my left hand. I wanted to show you this great tool from Wilton. It’s their new Icing Smoother (also up for grabs in this giveaway!), and it helps give your cake that nice sleek look.
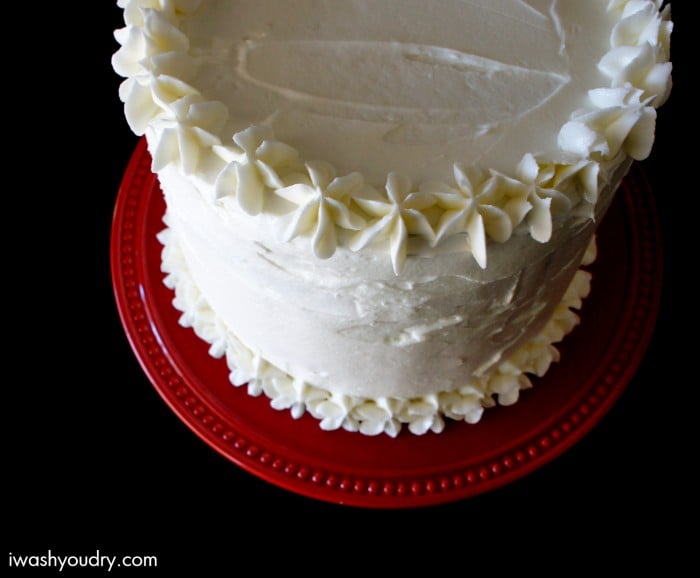
To create those cute stars, save a little bit of frosting and use a disposable frosting bag (also up for grabs in this giveaway!) and use with the Large Drop Flower #1B tip from Wilton.
And now you’re done!
See that wasn’t so hard was it?
Just wait till your friends and family cut into this cake…
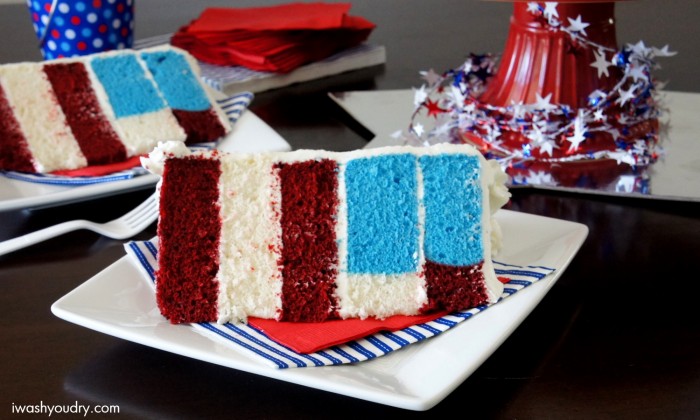
Look how cute that is!
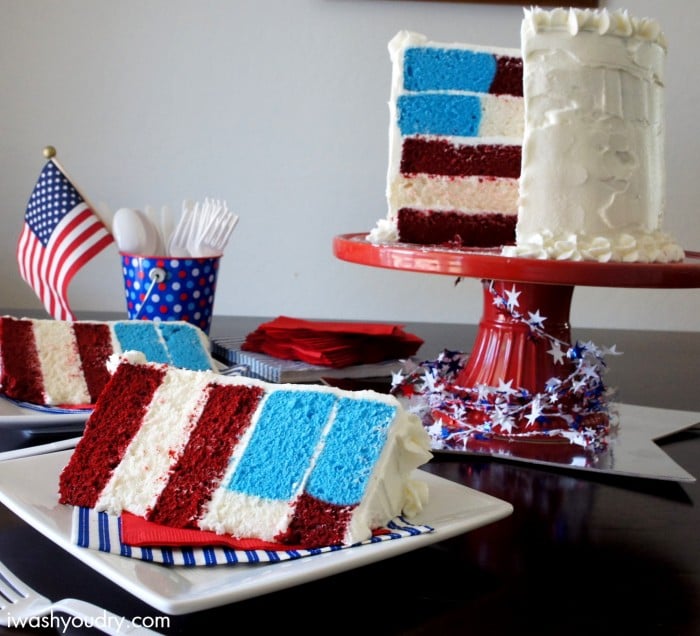
So Patriotic!
HELPFUL PRODUCTS TO MAKE THIS RECIPE:
All American Cake and Classic Vanilla Buttercream Frosting
Ingredients
For the Cake:
For the Frosting:
- 1 1/2 cups butter, softened
- 1 1/2 cups shortening
- 6 tbsp heavy cream
- 3 tsp vanilla extract
- 1/4 tsp salt
- 5 cups powdered sugar
Instructions
For the Cake:
- Preheat oven to 350 degrees F.
- Cut 5 (8 inch) circles out of parchment paper to line the bottoms of the cake pans.
- In a large bowl combine the Red Velvet Cake mix with 1/3 cups oil, 3 eggs, and 1¼ cups water. Beat for 30 seconds on low, then an additional 2 minutes on medium speed.
- Remove ½ cup cake batter and set aside for later.
- Divide remaining cake batter among two 8" prepared cake pans, and bake for 32-35 minutes (for an 8" cake pan) or until toothpick inserted in center comes out clean.
- Let cool in pans for 15 minutes, then remove and place on wire racks to cool completely.
- In a clean large bowl combine 1 (18.25oz) box of cake mix with an ADDITIONAL 1½ cups (from another box of mix) of cake mix, with 6 egg WHITES, ½ cup oil, and 1 2/3 cups water. Beat on low speed for 30 seconds and then medium speed for another 2 minutes.
- Remove approximately 1/3 of the entire white cake batter and place in a separate bowl. Set aside for later use. To the remaining ? of white cake batter add ¼ tsp of Royal Blue Icing color, and continue to mix until the blue is fully incorporated into the batter.
- Prepare another two 8" round cake pans with parchment paper. Place a 4 inch round metal cookie cutter in the center of each cake pan. Fill one cookie cutter with the remaining ½ cup Red Velvet cake batter, and fill the other cookie cutter with the WHITE cake batter. Divide the BLUE cake batter between the two cake pans; filling the outer portion of the cookie cutter only. Carefully grab the outside of the cookie cutters and gently pull up to remove the cookie cutter from the cake pan.
- Bake for 28-30 minutes or until toothpick inserted in center comes out clean. Let cool in pan for 15 minutes before removing to cool completely on wire racks.
- Prepare one last 8" cake pan with parchment paper and fill with the remaining WHITE cake batter. Bake for 23-25 minutes or until toothpick inserted in center comes out clean.
- Trim the top "dome" of the cakes to make flat level cakes.
- To layer cake start by placing a tablespoon worth of frosting on the cake stand or plate to help anchor the cake, then top with a layer of Red Velvet Cake. Frost the top of the layer all the way to the edges, it's alright if it goes over the edge. Next place the layer of WHITE cake on top, followed by frosting, layer of Red Velvet, more frosting, Blue Cake with White cake Center, more frosting, Blue Cake with Red Velvet center.
- Frost the rest of the cake with the remaining frosting, reserving some frosting to decorate with desired frosting tips (optional) {I used large Drop Flower Tip #1B}
For the Frosting:
- In a large bowl combine butter and shortening. Beat until smooth and combined.
- Gradually add cream, vanilla, and salt to the bowl, and beat for an additional 2 minutes until smooth and fluffy.
- Add powdered sugar 1/2 cup at a time, beating in between each addition.
- Use between layers of cake, to cover cakes, and to decorate cakes.


STUNNING, Shawn. Absolutely stunning. I love it!
Thanks Cassie! 🙂
I’m wearing a red shirt! If only I had on some blue and white. . .then I’d match the cake!
I already follow you on Pinterest
I already like you on FB
White shirt! (great job on this…it’s beautiful!)
Liked Wilton on FB 🙂
Pinterest follower 🙂
Twitter follower 🙂
Liked on FB 🙂
RSS Subscriber 🙂
I love this cake … it’s so pretty … Shirt is blue, today 🙂
Black, white, and red polka dots!
such a fun giveaway + what an amazing cake. i’m super impressed! i’m currently wearing a gray shirt with red + navy writing on it, so it’s almost red, white + blue, which would match your cake. =)
Shared you on FB today. Cool cake-looks good!
WEaring a blue shirt today!
Liked wilton on FB
Already like you on FB
I “shared” this giveaway on Facebook.
I “liked” Wilton on Facebook.
I follow you on Pinterest.
I already “like” I Wash You Dry on Facebook. 🙂
What an adorable cake! I’m wearing a coral-colored shirt.
I tweeted the contest too!
i followed Wilton on twitter
i follow you on pinterest!
I follow you on twitter
What a fun cake, Shawn! This would make a stunning presentation at any 4th of July party.
Thanks Dara! 🙂
Super, super cute cake!!!! I am wearing a crimson shirt!
And I’m now following you on Pinterest!
I follow Wilton on Twitter!
I like Wilton on FB!
And I like you on Twitter!
I like you on FB!
I follow you on Twitter!
That is so cool, Shawn!!! And it doesn’t look too difficult! I’m wearing a blue shirt!
Purple!
Another option might be to get the Wilton Checkerboard Cake set, and either two extra cake pans (I think the set uses 9″ round pans), or bake the cake in two batches. And if you’re really adventurous, you could even use the Wilton Cake Leveler to torte the red velvet layers and white cake layers to make more stripes.