What I love most about the Holidays is being able to spend time with the ones I care about most.
Which means I am not interested in spending countless hours in the kitchen cleaning up sticky messes, and stuck on food. We all know that I am always looking for the easiest way to do things, and this Holiday is no different. I’ve got my secret weapon that I’ll use to ensure that all my recipes come out right the first time and I’m not left cleaning up a mess in the kitchen and missing the party.
So what’s my secret weapon? PAM Cooking Spray!
I love using this handy non-stick cooking spray to save me precious time AND valuable ingredients while making my recipes.
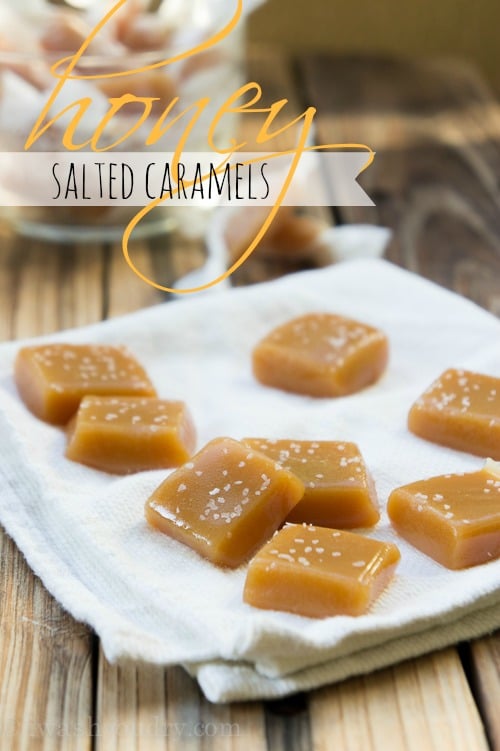
Take these Honey Salted Caramels for instance…
Have you ever tried to measure out 1 cup of honey? You almost never get every drop of honey back out of the measuring cup, which can result in a recipe FAILURE!
When it comes to making your Holiday recipes – every. drop. counts.
Solution – use PAM! 🙂
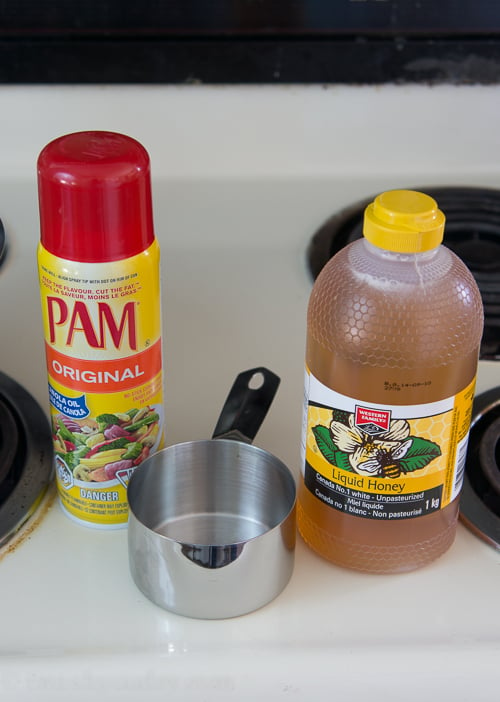
Simply spray the inside of your measuring cup with a little bit of PAM Cooking Spray, and watch the honey come sliding right out.
Every. Last. Drop.
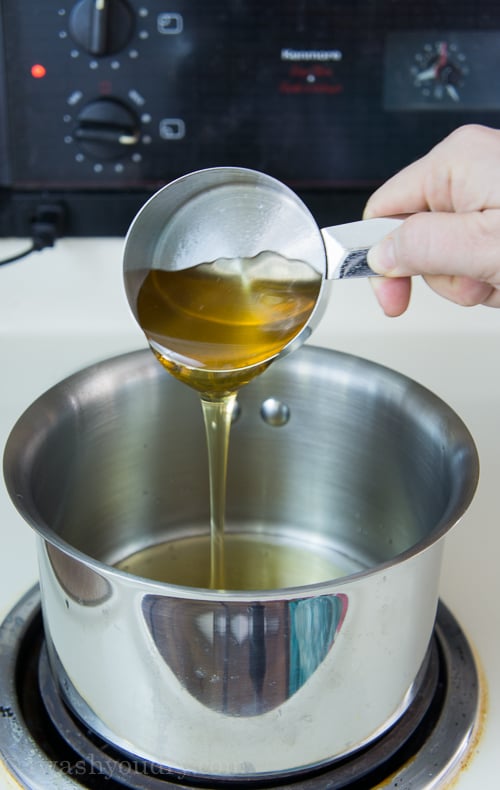
Isn’t that neat!?
This trick works for any sticky substance – corn syrup, maple syrup, agave nectar, etc.
Not only can you use PAM to coat the inside of your measuring cup, I even used it to coat the inside of the pot I made these Honey Salted Caramels in! After my 3rd attempt of perfecting this recipe, and seeing all that leftover caramel sticking to my pot, a light bulb went off. Spray the pan with PAM too!
Did you know that PAM Cooking Spray leaves up to 99% less residue buildup than margarine or bargain brand cooking sprays, while still offering superior no-stick results? Winning!
Plus their formula contains zero calories, so no worries on that end!

Making Caramels can be a teensy-bit intimidating, but I’ve taken step by step pictures to show you how simple it can be.
There are a couple things you’re going to need to make sure you get perfect results: A candy thermometer and PAM.
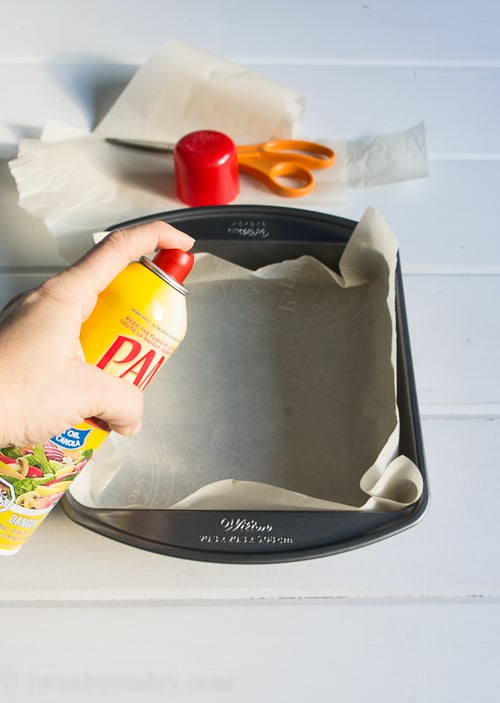
Start by tracing around a 9×9 or 8×8 baking pan with parchment paper, leaving 1 inch on each side. Cut and place the parchment paper inside the pan, then spray lightly with PAM Cooking Spray.
Make sure you have all your ingredients out and ready to go because the process can go quickly if you’re not prepared.
Spray the inside of your pot (I used a 3 quart size pot) with PAM Cooking Spray to make sure you get all your caramel out later on.
Spray the inside of the measuring cup that you’re going to use for the honey, and get that ready to go!
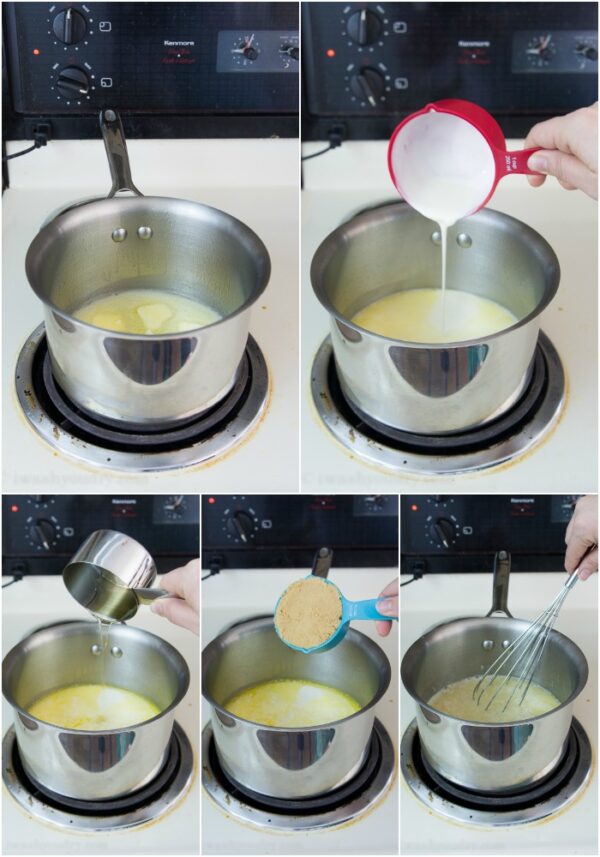
Melt the butter over medium high heat, reduce heat to just over medium and then add the cream, honey and brown sugar.
Give it a little whisking to break up any brown sugar that is being stubborn.
Attach the candy thermometer to the side of your pot, making sure to NOT let it touch the bottom of the pan (if it does it can give you an inaccurate reading).
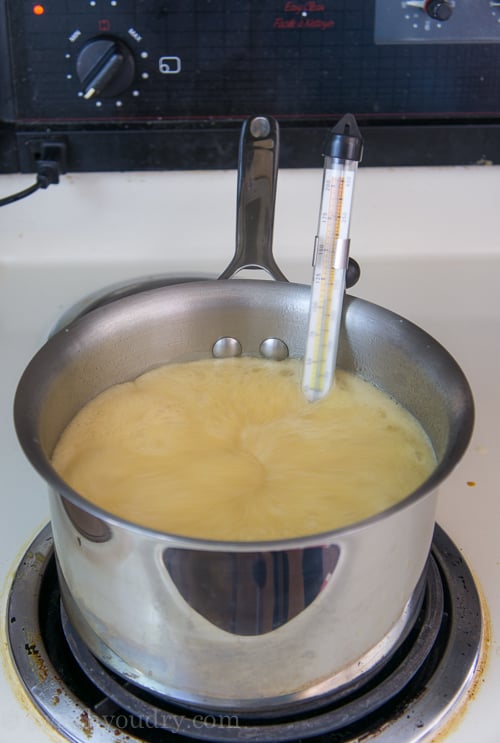
Bring the mixture to a boil then reduce the heat again to just below medium.
The caramel mixture will rise and bubble rapidly, but just let it do it’s thing. Don’t stir it.
We are trying to bring the caramel slowly up to 250 degrees F, while still set just below medium heat. This process should take around 30-40 minutes. Hang out nearby, grab a magazine, play Candy Crush, surf Facebook… just don’t go too far cause you want to keep an eye on the temperature.
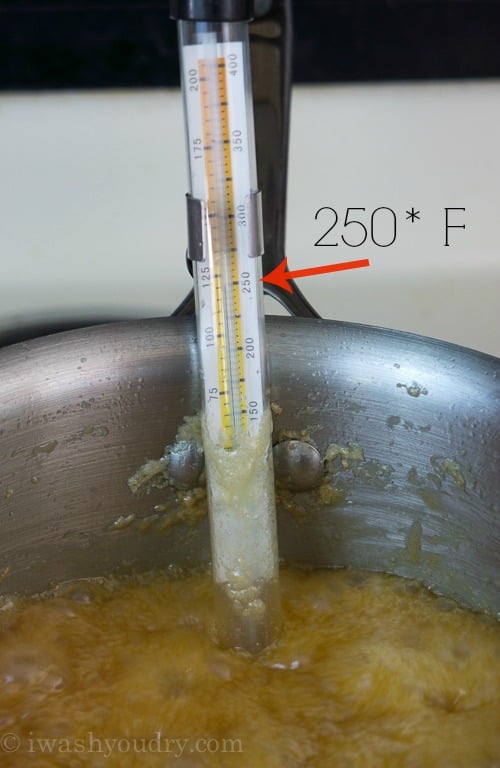
You’ll notice you’re getting close because the caramel mixture will reduce in size. Once it reaches 250 degrees remove it from the heat.
Carefully add the vanilla and use the end of your thermometer to gently stir the caramel. Pour the honey caramel into your prepared pan. Use caution because it’s EXTREMELY hot!
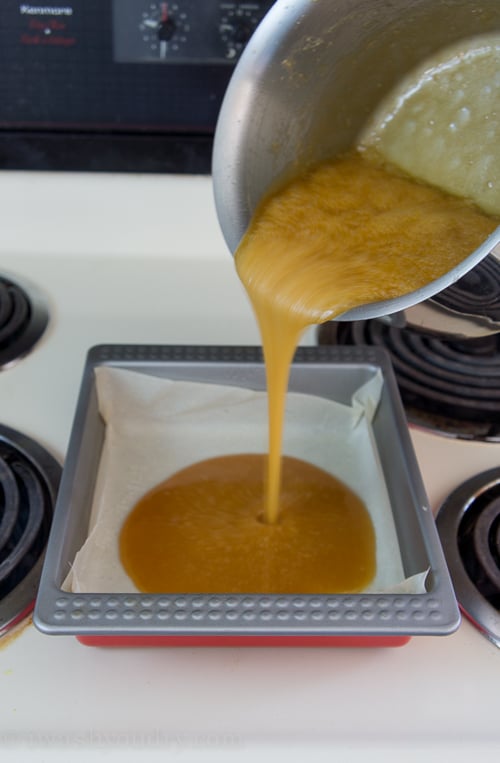
Let your caramels sit and come to room temperature. I set mine on a cooling rack by an open window to speed up the process.
Once it’s cool you can sprinkle it with coarse or flaked sea salt.
This caramel is a very soft caramel at room temperature. It’s best when stored in the fridge. So once they are at room temperature throw them in the fridge for at least 3 hours before cutting into pieces and wrapping with wax paper.
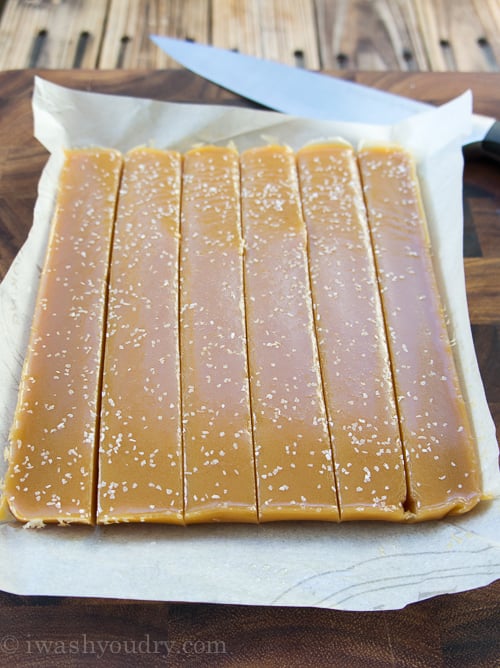
I could not be more happy with these sweet little caramels.
The touch of sea salt on top really brightens the flavor of the honey.
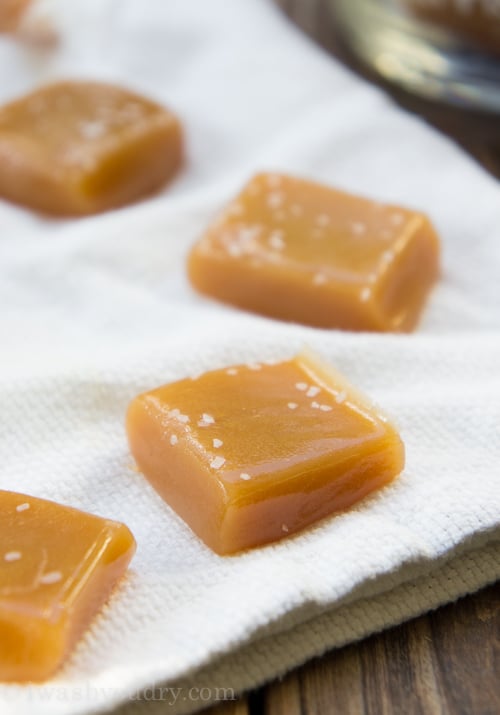
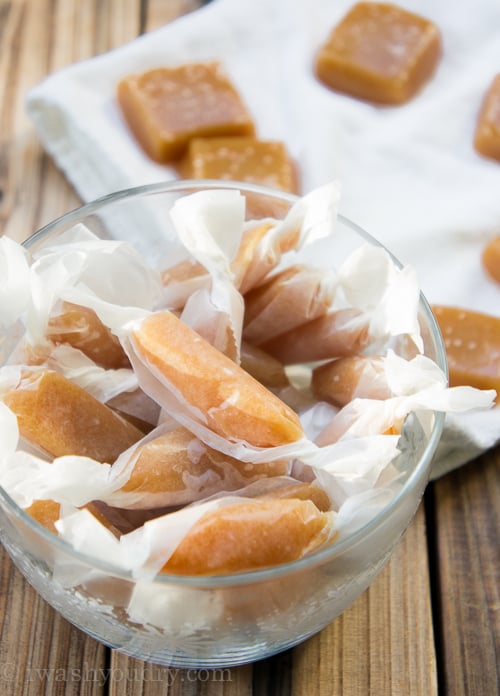
I love wrapping these tiny morsels in wax paper and keeping them in the fridge for when friends or family come to visit.
It’s the perfect way to let them think I slaved all day in the kitchen for them… when really, it was a snap thanks to PAM! (and this crazy awesome tutorial…)
So tell me…
What’s your favorite holiday “time-saving” tip??
(giveaway closed)
What secrets do you have that allow you to spend less time in the kitchen and more time with your loved ones? Your answer could win you a $100 Visa gift card! Wouldn’t that just be perfect for the upcoming holidays?! Imagine… $100 and some Honey Salted Caramels… life couldn’t get any better! 😉
Honey Salted Caramels
Ingredients
- 1/2 cup butter
- 1 cup honey
- 1 cup heavy cream
- 1/2 cup brown sugar
- 1/2 tsp vanilla extract
- 1/2 tsp salt
Instructions
- Be sure to have all ingredients measured and ready to go before starting.
- Line an 8x8 or 9x9 baking pan with parchment paper, so that it comes up 1 inch on all sides. Lightly spray with PAM Cooking Spray. Set aside.
- Spray a 3 quart size pot with PAM Cooking Spray, add the butter and melt over MEDIUM-HIGH heat.
- Add the honey, cream and brown sugar. Stir gently with a whisk. Reduce heat to JUST ABOVE MEDIUM.
- Attach your candy thermometer to the side of your pot, making sure that it does not touch the bottom of the pan.
- Once the mixture starts to boil, reduce the heat to JUST BELOW MEDIUM, and let it simmer there for 30-40 minutes until it reaches 250 degrees F.
- Remove from heat, add the vanilla and use the candy thermometer to gently stir it in. Carefully pour the caramel into the prepared pan. Let cool until room temperature and then sprinkle with the sea salt.
- Place in fridge and let chill for at least 3 hours before lifting parchment out of pan and cutting into small pieces. Wrap pieces in wax paper and store in fridge. Enjoy!

When I make sugar cookies and want to frost them all quickly I add equal parts milk and light corn syrup to the powdered sugar until it is smooth but not runny. Then i just dip the cookies in and you get a perfect coat of shiny awesome frosting!
Hi there, do you think it’s possible to introduce a little bit of dark spiced rum into this recipe? I am afraid of putting too much of a liquid consistency, or of adding too much moisture. Thanks a lot!
I use cake mixes to make cookies and use parchment paper when baking
Whenever I roll dough I put it between two sheets of wax paper, it prevents sticking and is easier to clean!
I hate to admit it, but I sometimes use the already made sugar cookie dough in a tube…….when I need to save time during the holidays………
Nothing wrong with pre made sugar cookie dough! I love the Pillsbury kind! 🙂
My time saving tip is to have my husband do the dirty dishes as I cook.
Tweeted 🙂 – https://twitter.com/Enter_Now/status/417546099445223424
I combine the two! By having the kids help in the kitchen, I get to spend time with them AND they do some of the work, so I spend less time in the kitchen too 🙂
tweeted as @tmtsweeps on 12/29/13 about gw
My best tip is when other offer to bring food or help with cleanup, Let them!
I make the desserts a day before the event.
To save time, I plan out my preparations and enlist my teenaged daughter in the process. By doing this, I not only delegate the smaller tasks, but also teach my daughter how to cook the recipes used by my mother and grandmother and to pass on a family tradition. Also, we use the dishwasher and load it as we go so the dishes can be washed while we’re busy with other things.
https://twitter.com/deafsongbird/status/417473737995612160
I hate chopping onions and garlic so I pick up the frozen garlic cubes and pre-chopped onions from Trader Joes. I know I pay more but after a long day at work, it is so worth it.
Gather the ingredients and utensils for the next recipe while completing the current project.
When using peanut butter in a recipe I melt it in the microwave before mixing it with other ingredients – much easier to mix, blends better, and takes half the time!
I enlist the help of family and friends in the kitchen-even the littlest child loves to help!
My tip for gifts comes from my mother-in-law: during the summer, gather your fruits for your jellies and make your juice. Place the juice in the freezer, and when harvest time slows down, you can pull out the juice, thaw it, and can your jellies for gifts.
I get all my shopping for gifts done ahead of time and I cook up as much as I can ahead of time so I can enjoy the holiday with family
https://twitter.com/bittripfan/status/417459681460629504
I plan out what day I am going to be baking
My favorite tip is to prepare ahead as much as possible. Freezer friendly meals are a lifesaver.
How often do you stir while it’s on the 30 to 4 minutes?