
The last few months of the year are seriously my favorite. Why? Because I get to let my creative juices flow.
I love creating things. I love crafty things. AHHH!! It’s so exciting!!
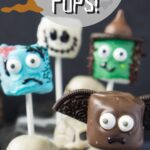
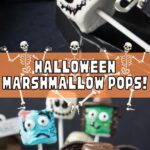
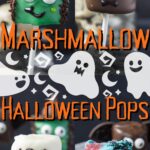
So last year I created some adorable Halloween Marshmallow Pops that included a Mummy, Pumpkin, Frankenstein, and a Vampire.
I can’t tell you how long I have been waiting to create more Halloween Marshmallow Pops for you. I sketched out several ideas a couple months back, I actually had several jotted down, but decided to narrow it down to just 4.

A Zombie, a Bat, a Witch, and a Skeleton!
You might look at these and think, “I can’t do that. It’s too complicated, too time consuming, too many parts, etc…”
I’m here to tell you, that you CAN do this. It’s EASY. Let me show you how.
There are a lot of pictures here, but it’s to help you understand how easy these are to make. Let’s get started!!
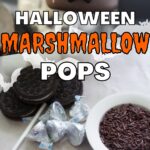
You will need some colored Candy Melts. I picked these up at Walmart, but you can find them at craft stores in the cake decorating isle as well. You also can purchase them here on Amazon.

Melt the chocolate in a mug according to the package instructions. I prefer using a mug because it’s deeper and allows you to easily dip the marshmallows in the chocolate.
For the Zombie I used a light blue color.

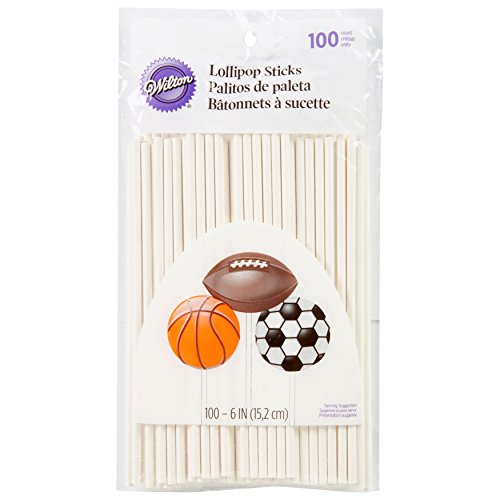
Put marshmallows on sucker sticks. Again, you can find the sucker sticks in the cake decorating isle of Walmart or craft stores, and here on Amazon.
Push the stick into the center of the marshmallow, but not out the other end.

Dip the marshmallow in the colored chocolates. For the Zombie, I dipped the marshmallow then swirled in around the cup, slapping it on the sides, to give it a beat up/skin falling off sort of look.

Add some candy eyeballs. The eyeballs are in the cake decorating isles and here on Amazon.
For the Zombie I placed the eyeballs off centered and smushed them in the chocolate a little to give it more character.

Add the details. I used some red and black sugar crystals to decorate the Zombies.
Red = blood. Black = dirt/gravel? Haha, I don’t know…

Add the mouth with a black sparkle gel frosting tube from Wilton. I use this for all my marshmallow pops, and it’s so easy.

Done!
Wasn’t that easy?! I think these Zombies are so fun, everyone will love these un-dead creatures!
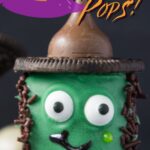
Ready to make the Witch?
Here’s what you need-

Melt the green chocolates according to package instructions.

Dip your marshmallow on a stick into the dark green chocolates.

Add the hair by rolling the covered marshmallow in chocolate sprinkles. Leave about 1/3 of the marshmallow free of sprinkles for her face.

Add the bottom of the hat by using one half of an Oreo cookie.

Give her some eyeballs. Place them somewhat close together. Press in and slightly push up to giver her some eyebrow dimension.
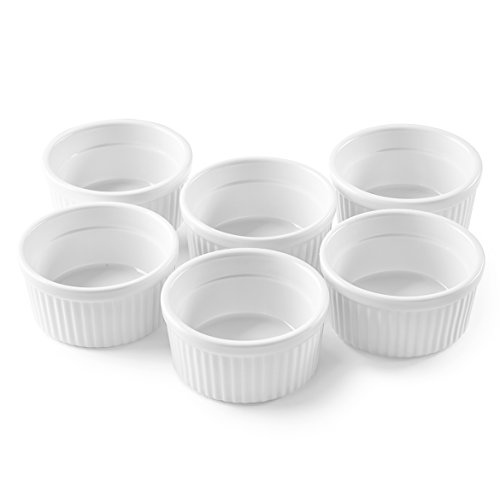
Let the witches dry by sticking the bottom end of the sucker stick into a styrofoam brick (found in the fake flower department of craft stores).

Add a drop of chocolate to the top of her hat, once the Oreo has had a chance to dry to the top of her head. If you do it too early, the weight of the kiss on top might make her hat slip off.

Put a Kiss on top to finish her hat.
Let it dry, then use the black sparkle gel pen to draw on a mouth. I also had a green sparkle gel pen that I used to give her a little wart. hehe.

Not as difficult as you thought, right?! You can totally impress your friends and family with these fun pops that are soooo yummy to eat too!
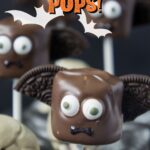
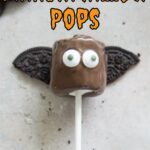
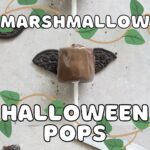
Let’s make the Bat!
Melt some dark chocolate candy melts according to package instructions.

Cut an Oreo in half. This can be a little tricky to do without crushing them, so just go slow and use a sharp knife.
Lay them out (like pictured above) on a sheet of wax paper.

Dip marshmallow in chocolate.
Lay on top of the Oreo cookies.

Add some eyeballs.
Leave the Bat’s laying on the Oreos until they have dried completely. Once they are dry, you can use that trusty black gel pen to draw on the mouth.
I just drew a straight line across, then pulled the edges down slightly to make it look like fangs.

Isn’t the Bat so cool!? It took me a while to figure out how to do the wings. I love it!
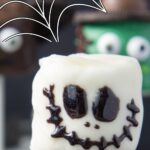
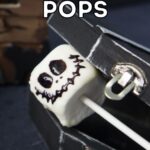
It gets even easier with the Skeleton!
Melt your white chocolate melts according to package instructions.
Dip your marshmallow.
Let dry.
Decorate with black gel frosting pen.

So. Easy.
My daughter has a Jack Skellington alarm clock, so I glanced at that when I decided how to draw the skeleton face. Just two big round eye balls, two small dots for the nose, and a big U that goes from one side of the face to the other for the mouth.
Anyone can make this guy!

These fun Halloween Marshmallow Pops will be the star of your Halloween party!
Don’t forget to go check out the Pops from last year too, those are just as simple!

Happy Halloween!
disclaimer: this post contains affiliate links.

We put sticks in marshmallows then froze on tray with parchment before decorating. It helped
Great idea! Thanks for sharing Carol!
I love them! I do craft fairs like to make some to bring ncan you freeze them?
Freezing would be just fine!
Wow! I love the Zombie Marshmallow pop. I would definitely make these for this years’ Halloween.
Great! I’m glad you like it.
These are amazing. Going to give them a whirl. Thank you
This is such a fun idea! Thanks for sharing. I read about your blog on http://bouldersweettooth.weebly.com/. Halloween lovers of the world unite! https://www.pinterest.com/laurakornish/halloween/ 🙂
Was thinking of putting these in lollipop bags but I’m worried about the gel sticking. Does it completely dry?
I’m the Editor of Fun Family Crafts and wanted to let you know that we have featured your clever zombie marshmallow project! You can see it here:
http://funfamilycrafts.com/zombie-marshmallow-pop/
If you have other kid-friendly craft tutorials, we’d love for you to submit them. If you would like to display a featured button on your site, you can get one from the right side bar of your post above. Thanks for a great project idea!